In This Article
- Video Tutorial
- Creating and Merging a Detection with a Detection Group
- Merging Multiple Detections to create a Detection Group
- Deleting a Detections Group or Segment
Overview
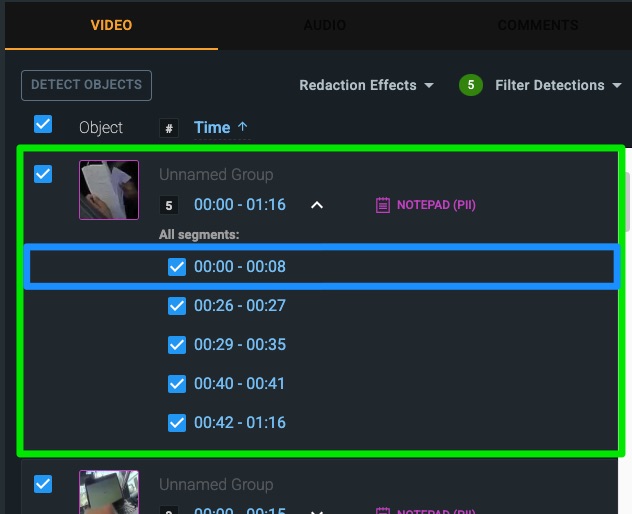
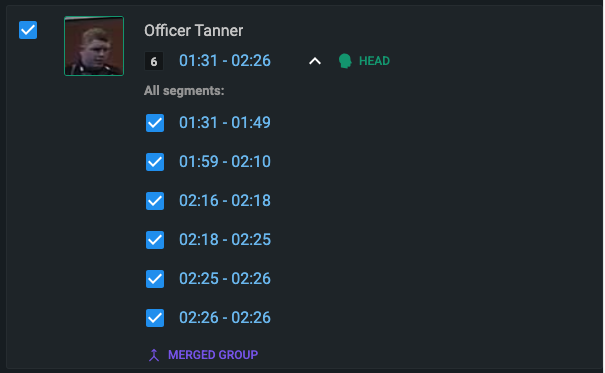
Within Veritone Redact, detections fall into two categories: a detection group and a detection segment. A detection group, shown below in green, is a collection of segments and has a thumbnail associated with it. A detection segment, shown below in blue, refers to an object, whether a head, notepad, UDR, etc., that has been detected and has a bounding box around it for the duration of detection.
Grouping allows you to organize your detection segments and groups by naming and merging them into a new group based on your needs. For example, if you wish to isolate all detections of a suspect, you can create a designated “Suspect” group and add all detections of the suspect, including any UDRs, to this group.
Video Tutorial
Creating and Merging a Detection to a Detection Group
1. Begin by naming the group you wish to add your detections to by hovering over  to the right of the detection, and selecting the
  icon, when it appears. Once you have entered your naming convention, select the
  to save your group name.

2. Locate and hover your mouse on the detection you wish to add to this group and select the  that appears.
3. From the menu, select “Merge with Named Group” and select the named group you wish to add this detection to.

Note: If you select a detection group that has multiple segments, all segments will be merged into your named group.
4. After merging your detection segment, your named group will be labeled “Merged Group” and contain all detection segments.

Tip: Selecting “Pin to Top” from the  menu allows you to pin one or more named groups (or detection groups) to the top of the video tab, making it easier to locate them.
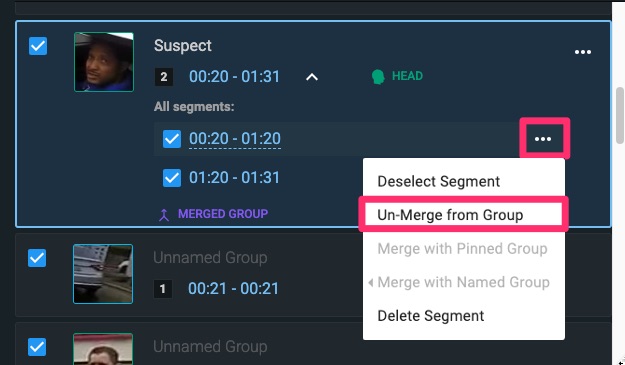
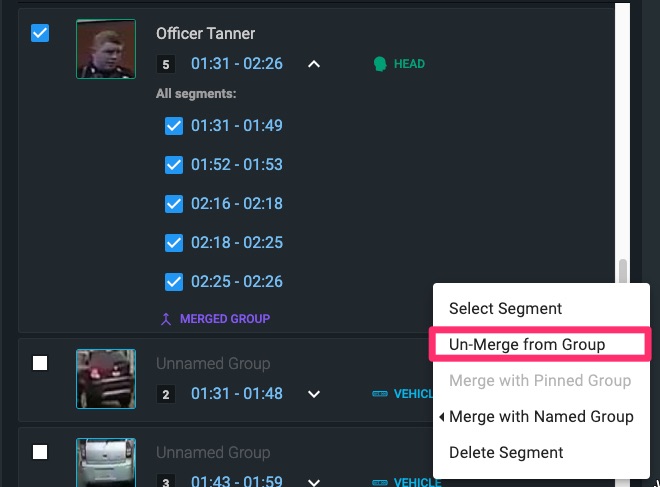
5. If you need to remove a detection segment from a named group, simply select the  icon associated with that segment and select “Un-Merge from Group.” Once unmerged, you can always merge this segment with a new detection group.
Merging Multiple Detections to Create a Detection Group
1. Locate and hover your mouse on the first detection you wish to add to a group and select the  that appears.
2. From the menu, click “Select.”

3. This detection group will now appear highlighted in blue and you will see a banner at the top of your video tab indicating 1 group has been selected.
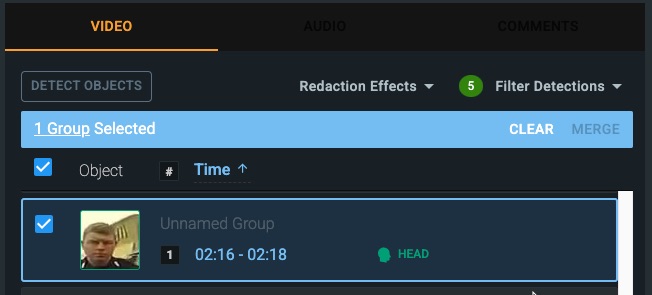
4. Locate all additional detections that you wish to merge, and select them as shown in step 2. To easily select your detections, hold Ctrl/Cmd on your keyboard and use your mouse to click on the additional detections to select them.
5. Once you have selected all the detections you wish to merge, select “Merge” from the blue banner at the top of the video tab or you can use the key on your keyboard to merge (and unmerge) detections.

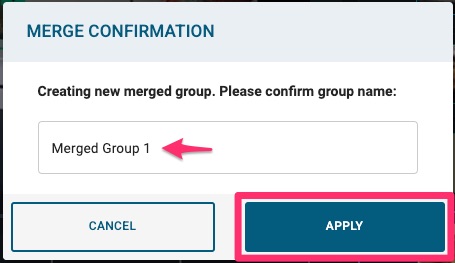
6. Name your new Redaction Group and select “Apply” to merge your group.
Deleting a Detection Group or Segment
1. To delete a detection group or segment, select the and select “Delete Group” or “Delete Segment.”
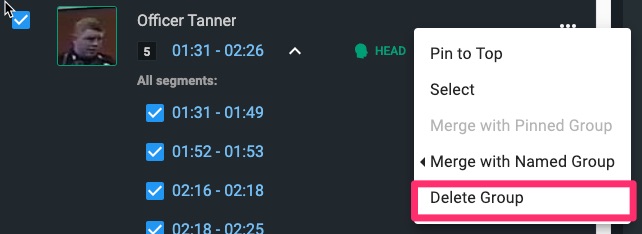
Note: Deleting a group will delete ALL segments associated with it. If you do this by mistake, you can undo the action using the  button above the video tab.
2. If you need to remove a detection segment from a group, rather than deleting it, you can simply un-merge the segment.
Additional Notes:
- All grouping activities will be captured on your audit log
- If your agency uses redaction codes, applying a code to one segment of a named group will apply it to all segments of that group. However, any segments merged after you have applied your redaction code will not automatically have that code applied.

