In This Article
- Video Tutorial
- How to apply Live Tracking UDRs
- How to apply Static UDRs
- Setting precise Start & Stop Times for UDRs
Overview
There will be instances when the Veritone’s detection engine may miss a head, person, license plate, notepad, or laptop and leaves portions of the object visible on-screen. Additionally, you may have objects other than our auto-detections that need to be redacted. In these situations, you would apply a manual redaction.
Manual redactions in Veritone are referred to as User Defined Regions or UDRs.
There are two types of UDRs: live tracking and static. Live Tracking UDRs are used for objects on screen that need to be redacted, but are moving as the video plays forward. Static UDRs are objects in the same place and size on the screen that need to be redacted for a set period or the entire length of the video.
Video Tutorial
Live Tracking UDR
1) To draw a Live Tracking UDR, begin by positioning your cursor in the media player. Left-click and hold your mouse while dragging until the yellow bounding box appears around the desired area.
2) Once you’ve drawn your box, if needed, you can resize and/or move it to ensure the redaction area is covered.
3) Double-click inside the yellow UDR box. This will enable Live Tracking mode. You’ll notice that your cursor has been replaced by the yellow UDR box. You can now move the box freely around your screen.
4) Using your opposite hand, select the right arrow key on your keyboard to advance the video forward. You can move frame-by-frame, or if you hold the right arrow key down, the video will play at normal speed. As you advance the video forward, track the desired object by simply following along with your mouse.
5) Once you’ve completed tracking your object, double-click the yellow UDR box to save your newly created Live Tracking UDR. You can repeat this process as many times as needed throughout the video.
PRO TIP: While live-tracking an object, the UDR can be scaled larger or smaller by pinching or stretching on your mouse trackpad or with your mouse scroll wheel, or you can use the keyboard shortcuts below.

Static UDR
1 ) To draw a Static UDR, begin by positioning your cursor in the media player. Left-click and hold your mouse while dragging until the yellow bounding box appears around the desired area, just as you would for a Live Tracking UDR.
2) Once your UDR box is drawn, click into the yellow UDR box, and select ‘Stick to Video’ from the menu in the upper right corner.
3) The Static UDR will automatically appear on the UDR Timeline as a new Overlay Group for the duration of the media file.
Setting precise Start & Stop Times for UDRs
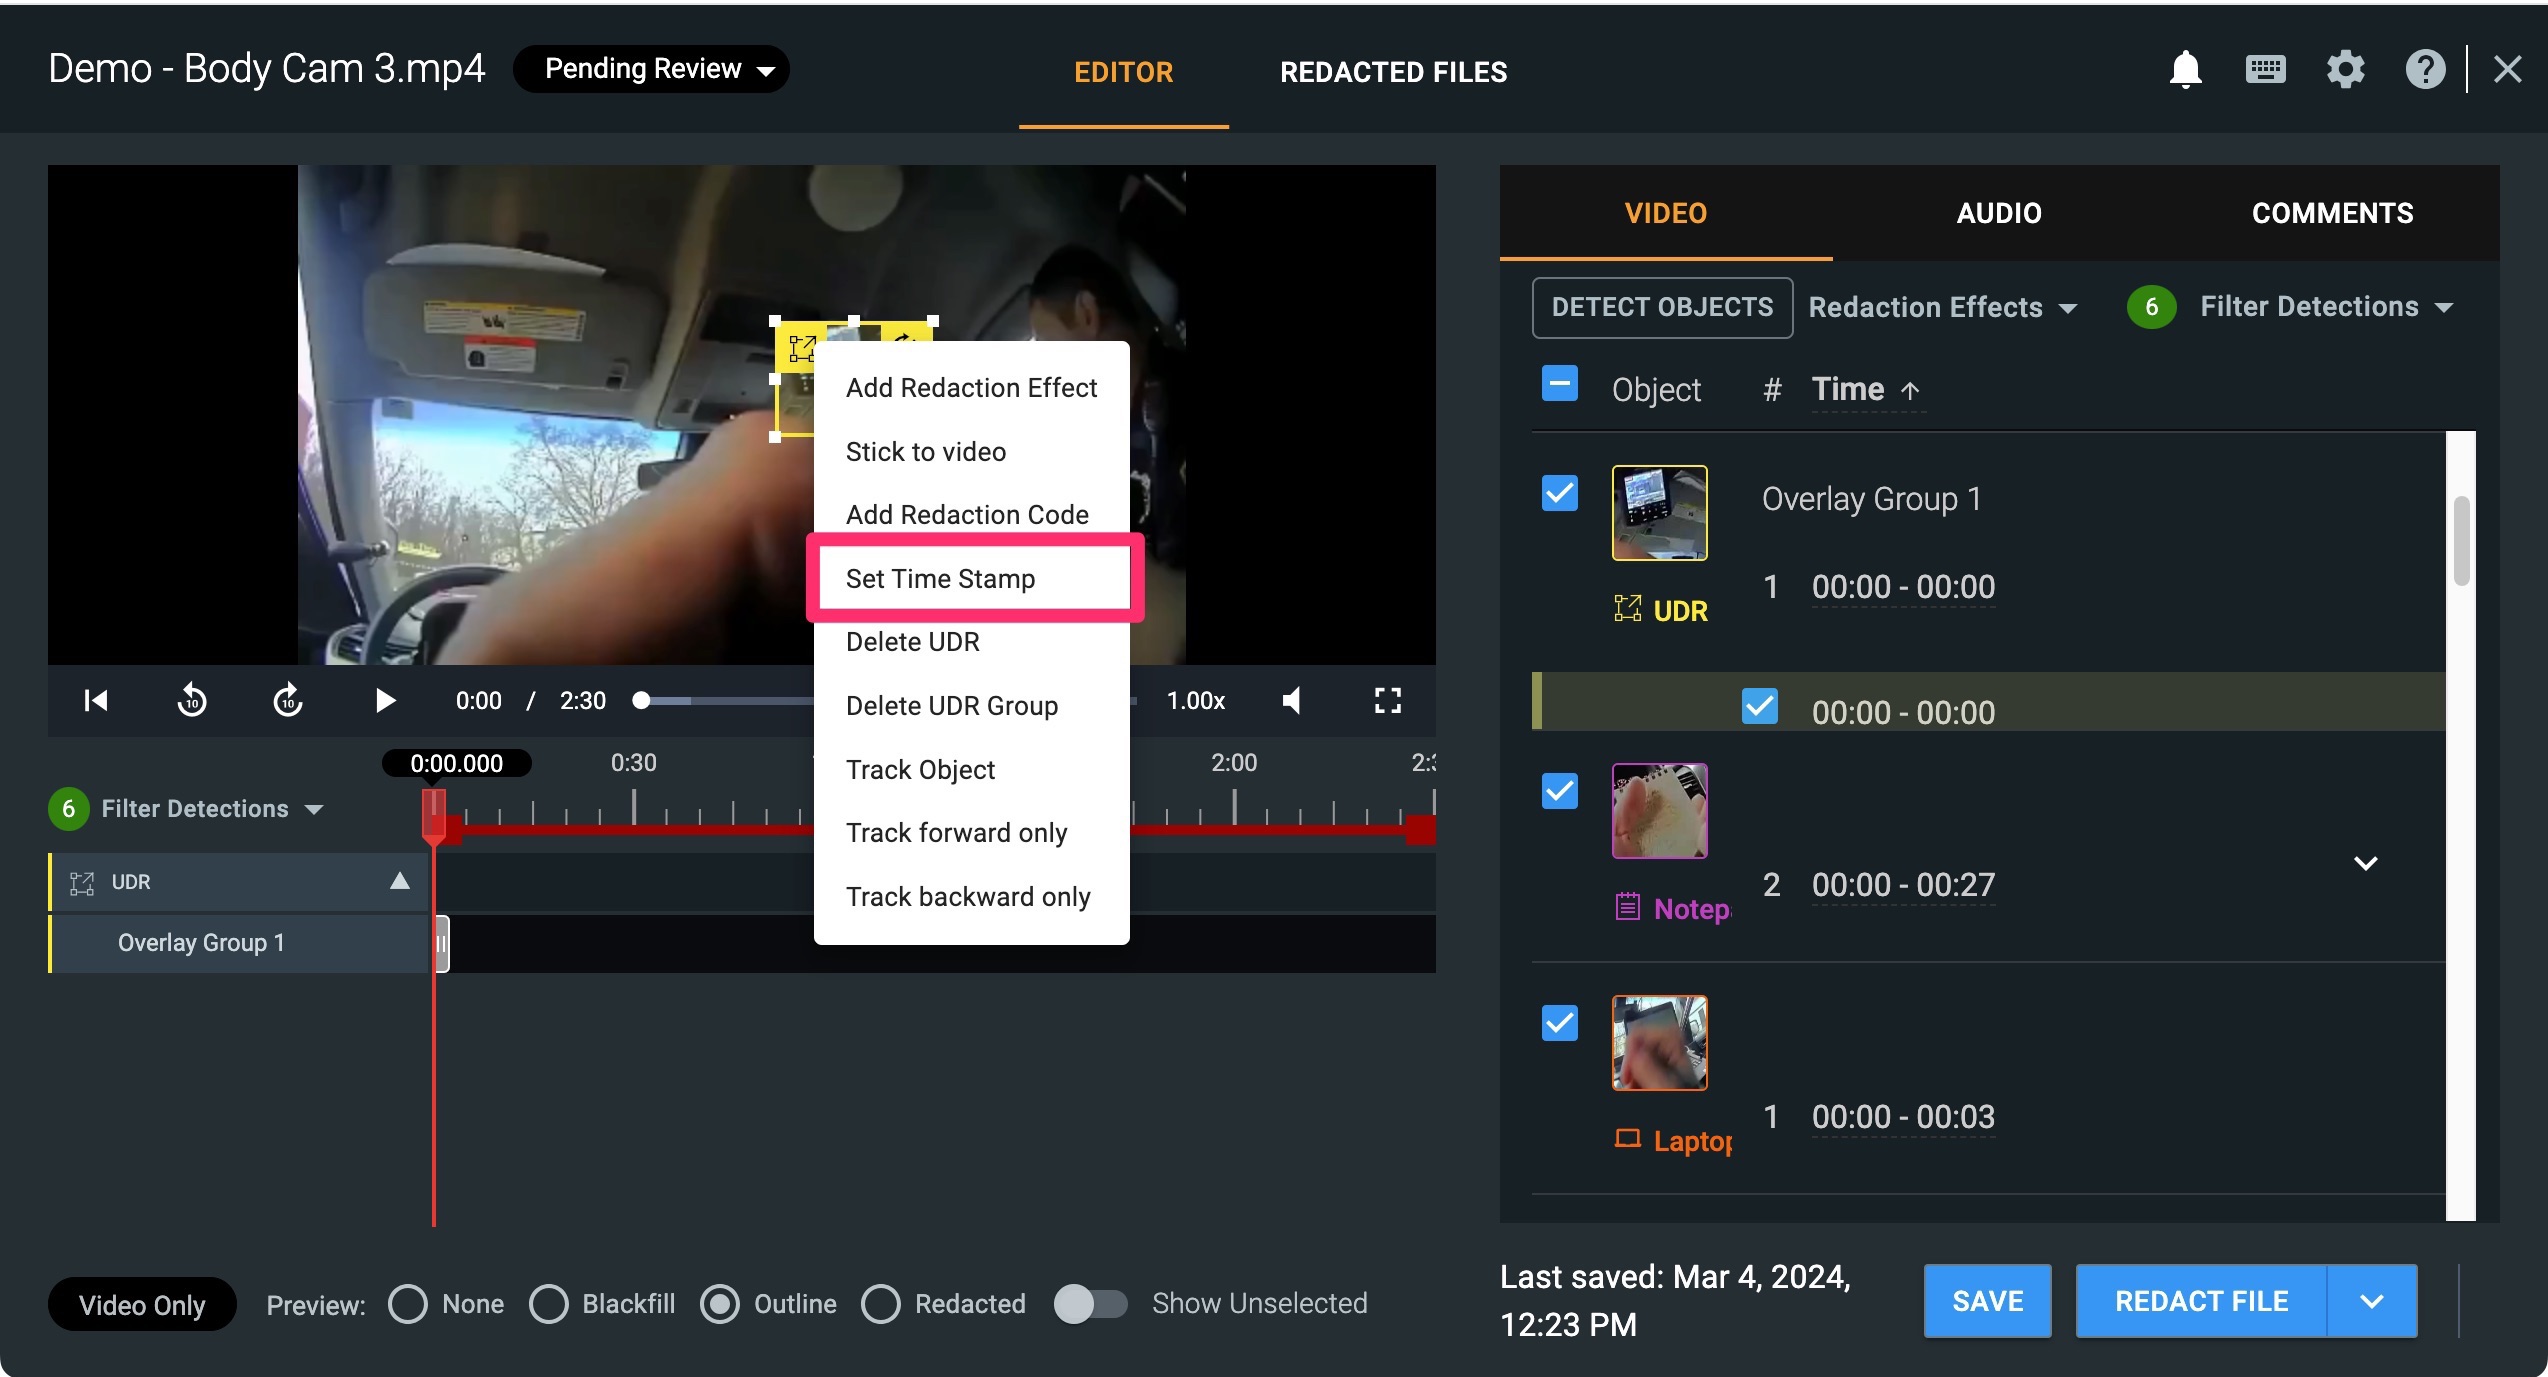
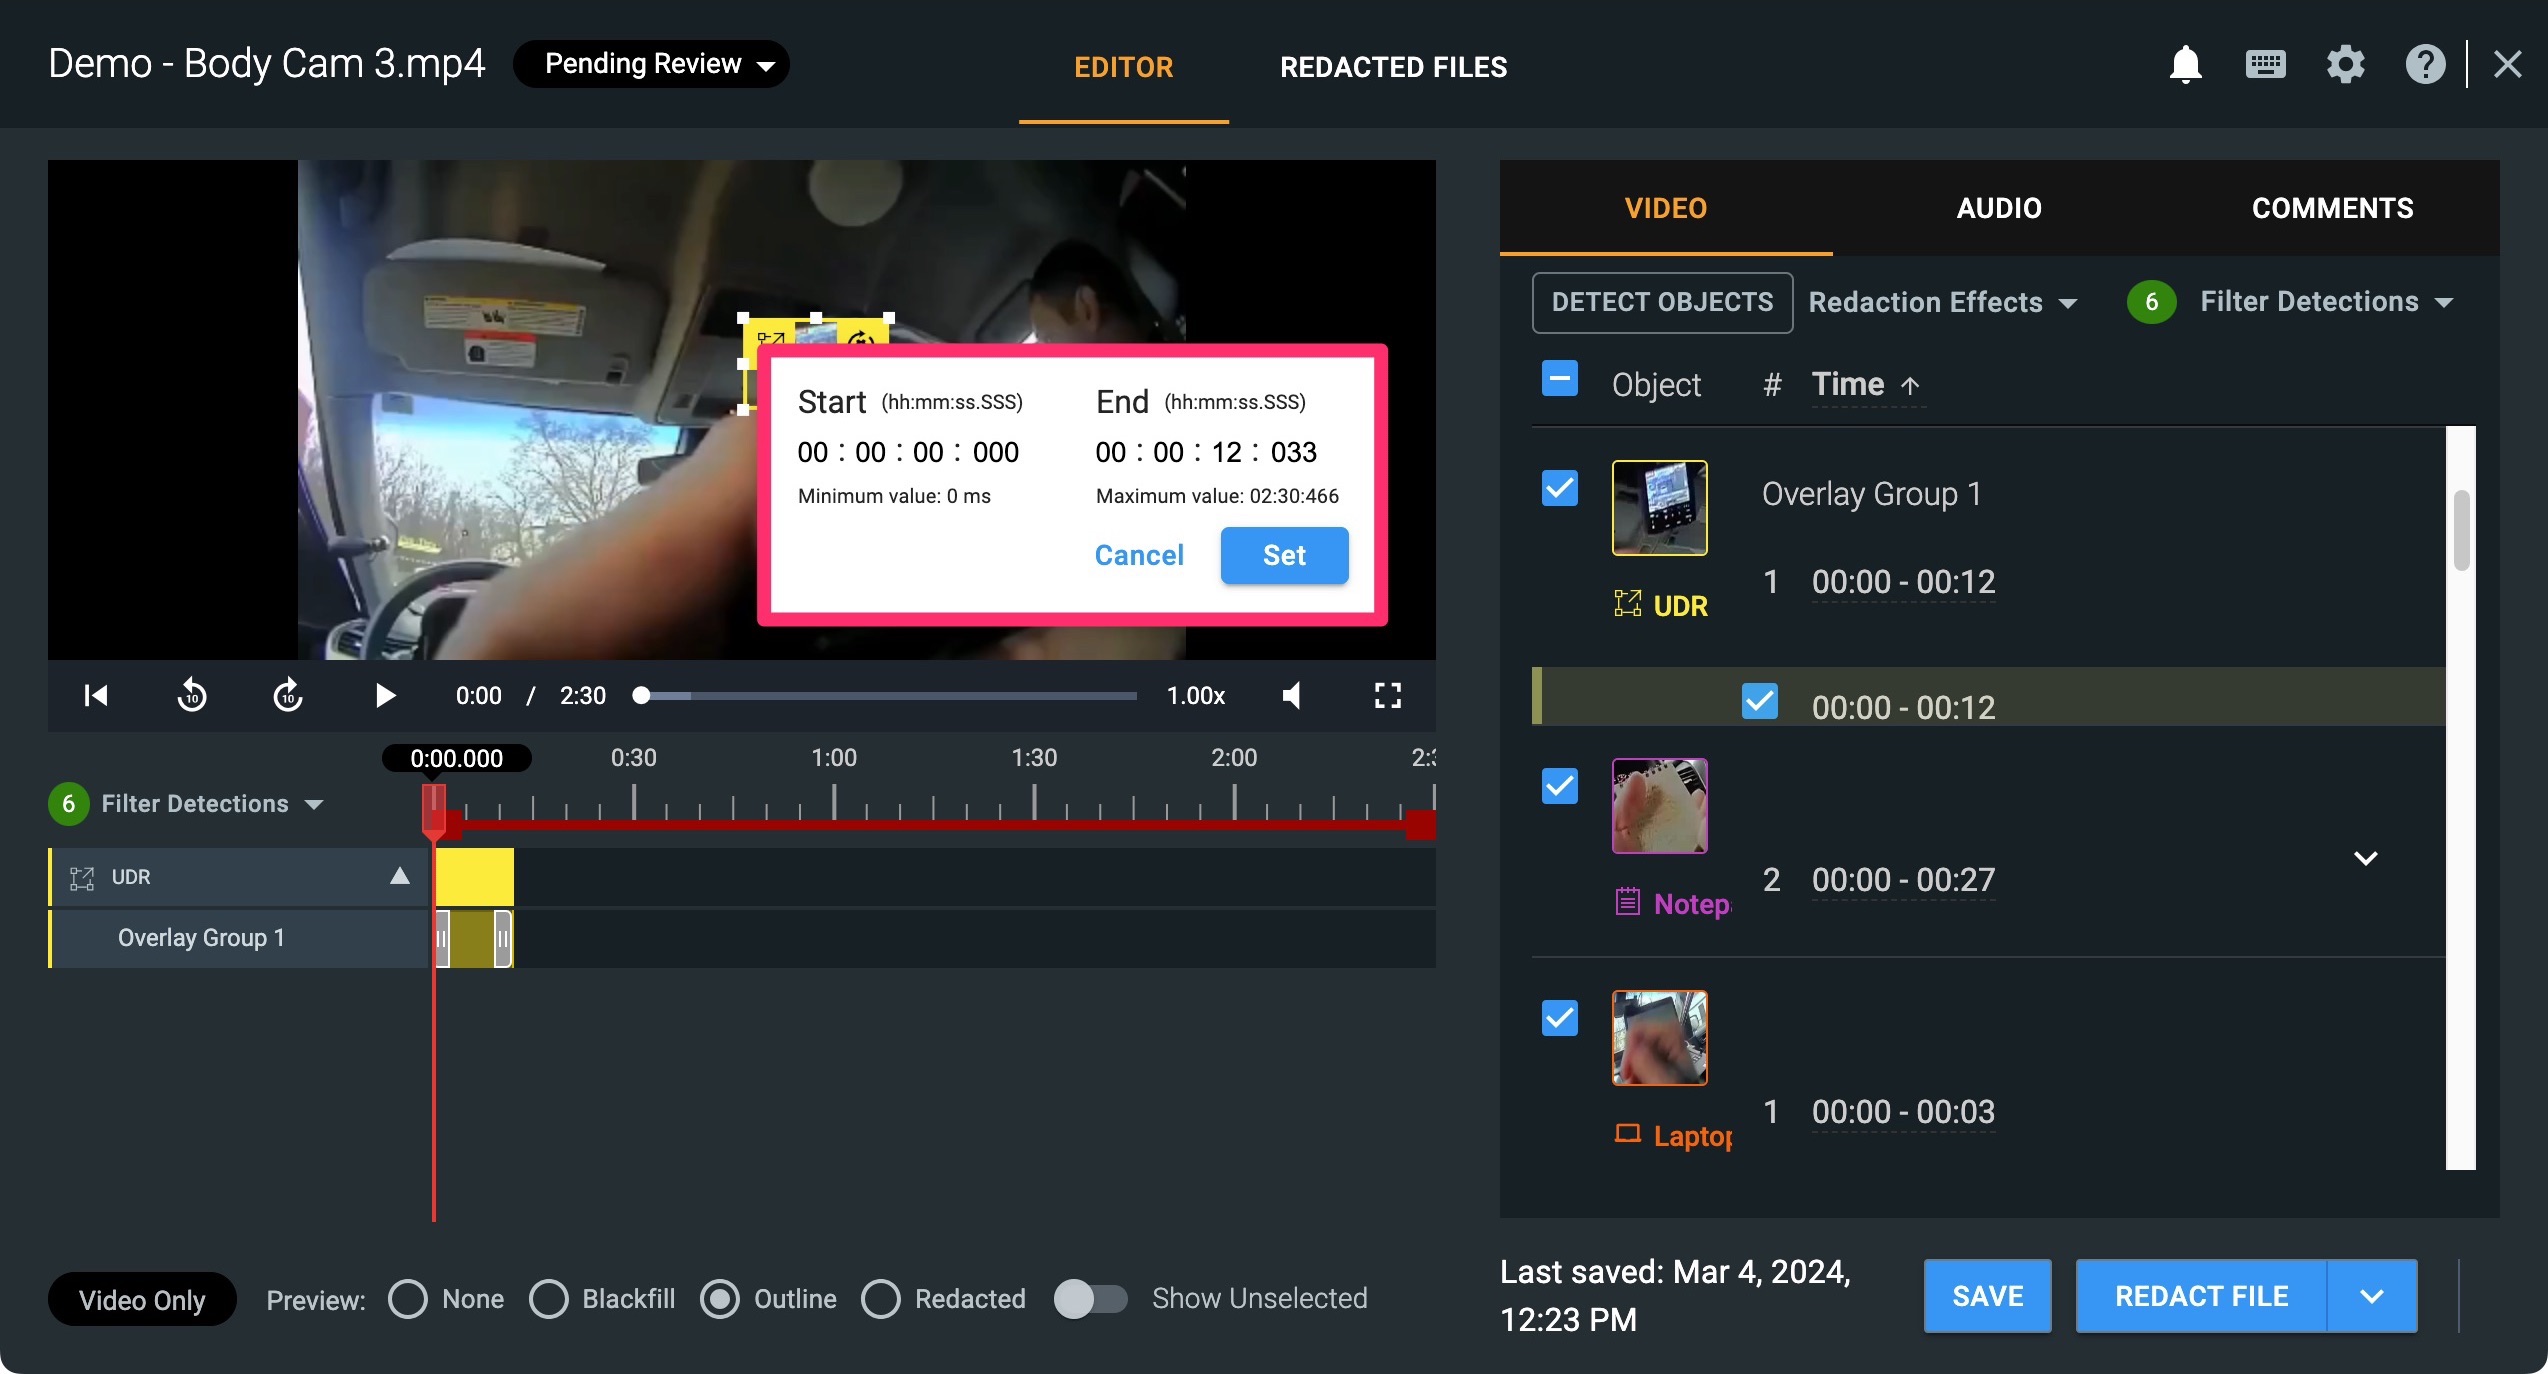
You can set precise start and end times for your UDRs. This is helpful when an object needs to be redacted for a short period of time or to extend an existing redaction area only slightly. To do this, click the small yellow box in the top left corner of a redacted blur region, which displays a drop-down menu. Choose ‘Set Time Stamp’ and enter your start and end time; or alternatively, you can manipulate the grey handle bars to redact an object for a specified time
PRO TIP: Our recommended minimum monitor resolution is 1920 x 1080 pixels. If you are having trouble accessing the buttons on small UDRs or detections, we recommend using a larger monitor.
If you have any questions about applying User-Defined Regions (UDRs), contact the Veritone Support team at Support@veritone.com.

