In this article
- Video Tutorial: Additional UDR Capabilities
- How to utilize track object
- How to rename an overlay group
- How to apply multiple redactions to a single overlay group
Overview
In addition to live tracking and static UDRs, Veritone Redact offers additional capabilities for manual redactions to improve your workflow.
For information on getting started with manual redactions, visit the help article How to Add User-Defined Regions (UDRs).
Video Tutorial
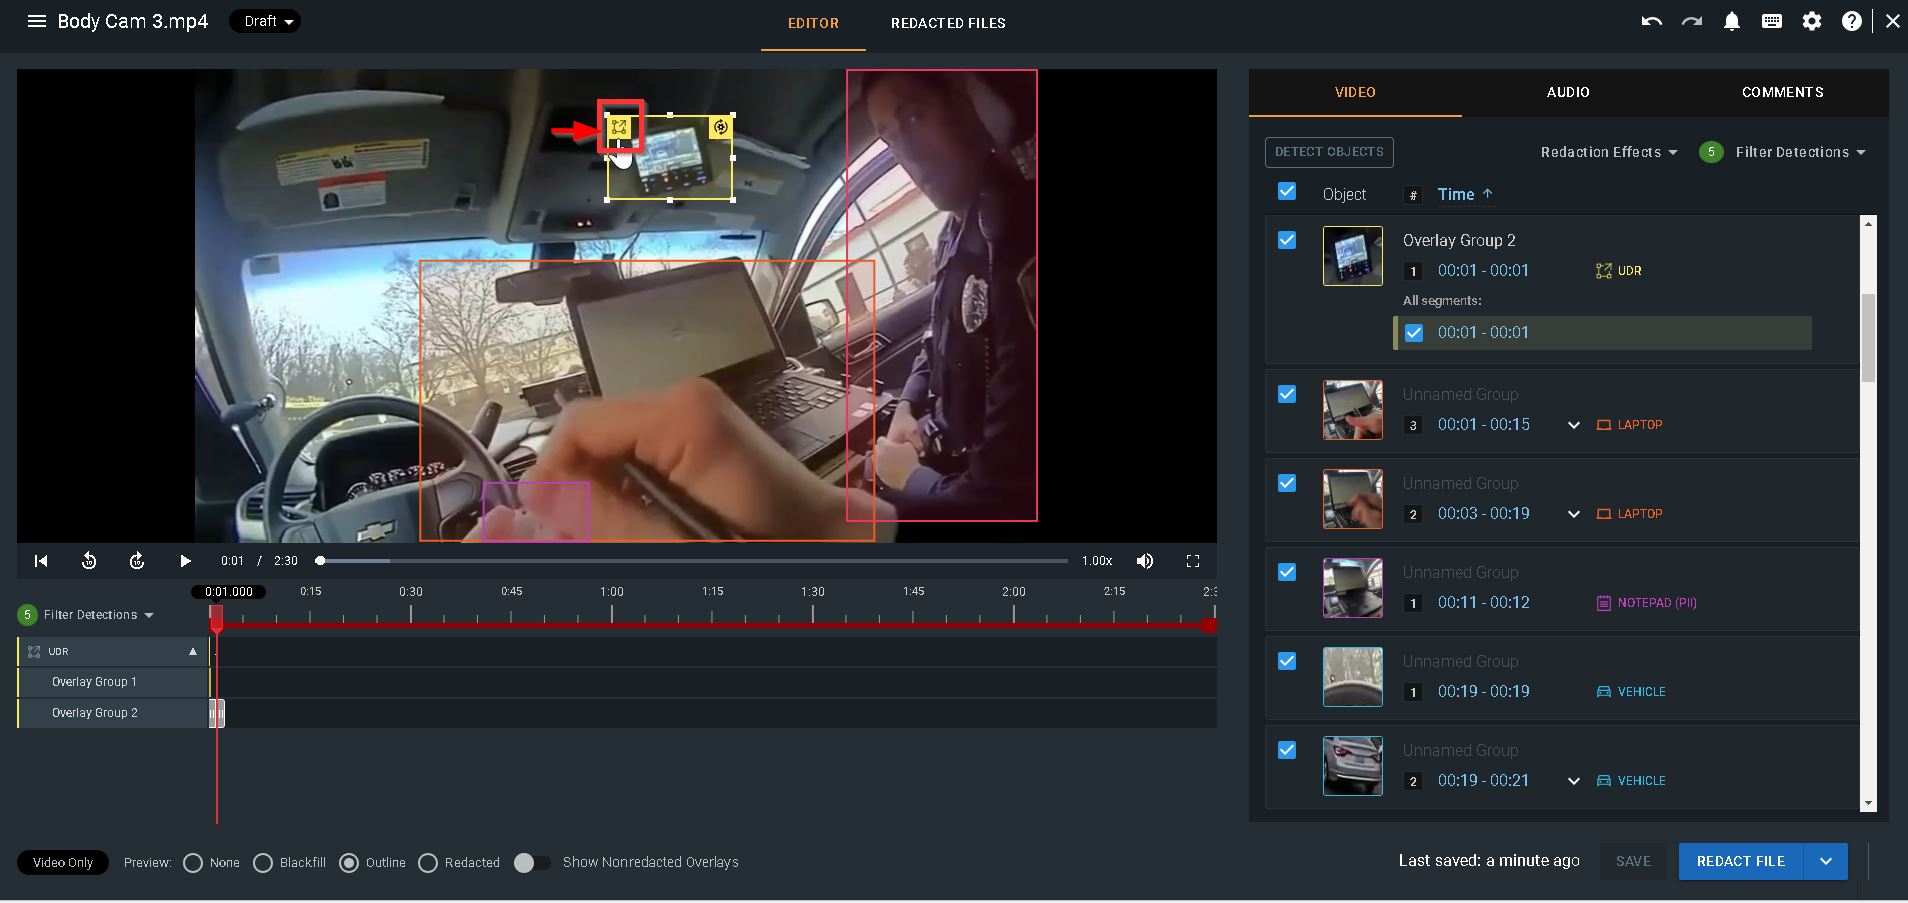
Track Object
Track Object will track a stationary object on screen forward and backward when there’s no dramatic shift of the object, like with CCTV footage. Once this is initiated, the object detection engine is tracking the object the yellow UDR box is covering from the beginning to the end of the file. If track forward only or track backward only is selected, you are directing the engine to follow the same process, but either by looking for the desired object from that point forward or backward.
1. After drawing your UDR, select the menu icon in your UDR.
2. From the menu, select Track Object, Track Forward Only, or Track Backward Only to initiate tracking. 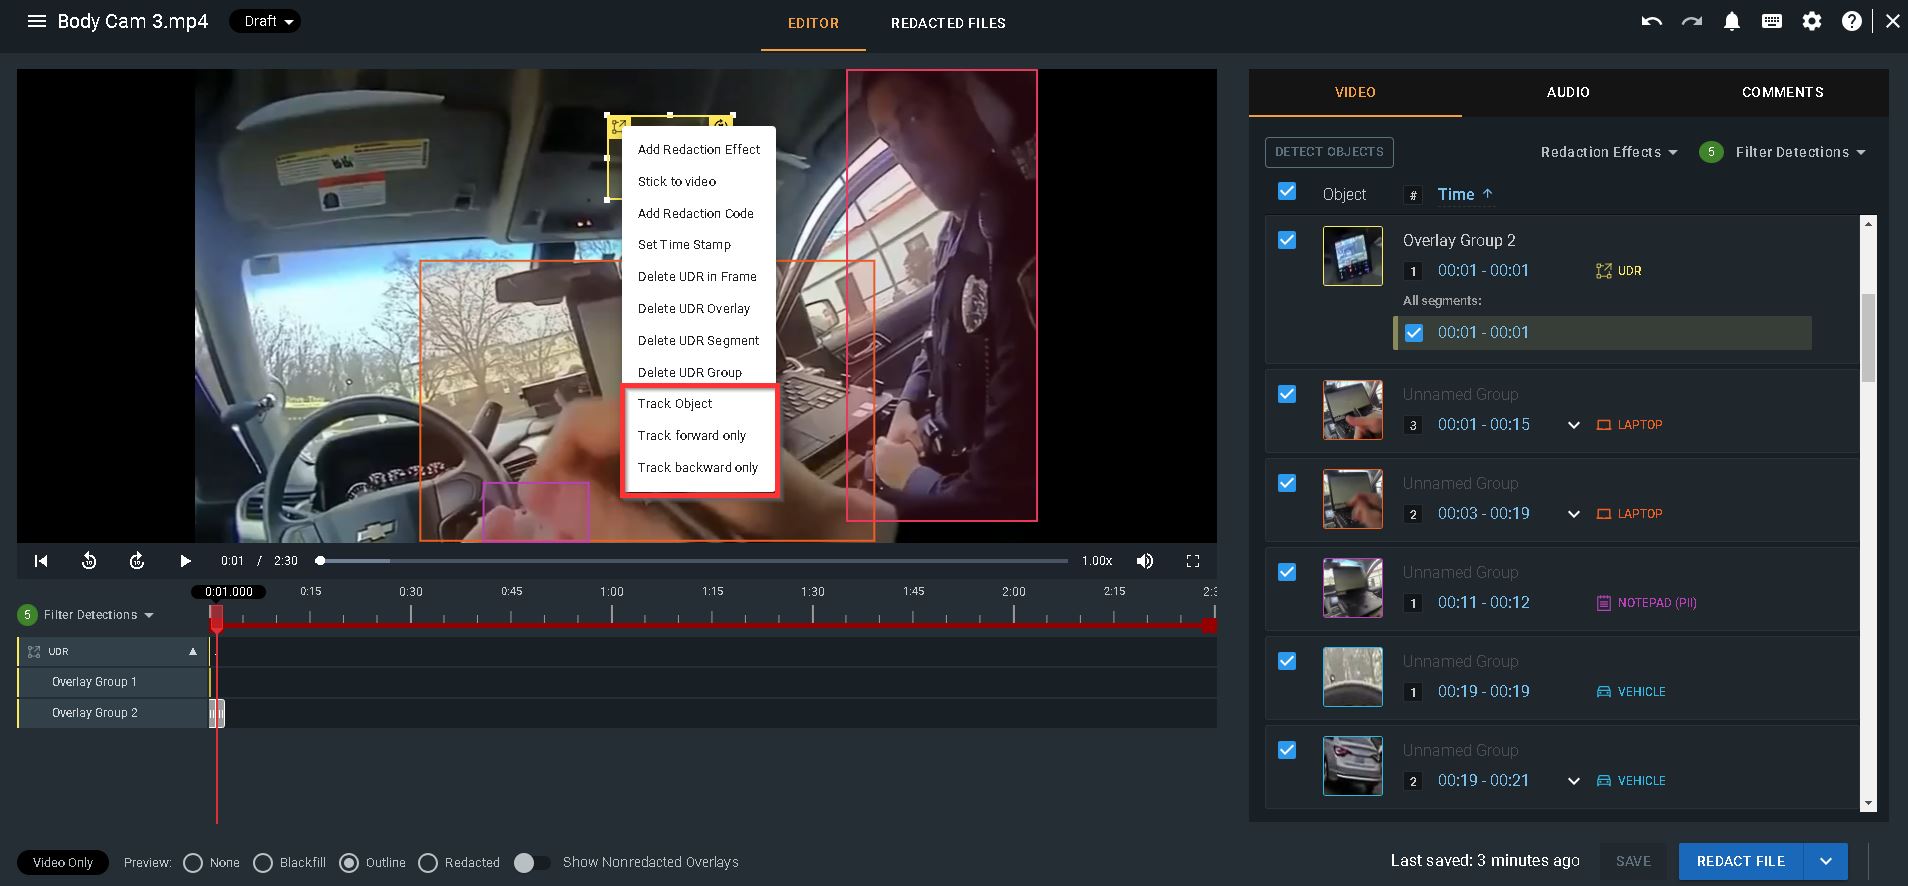
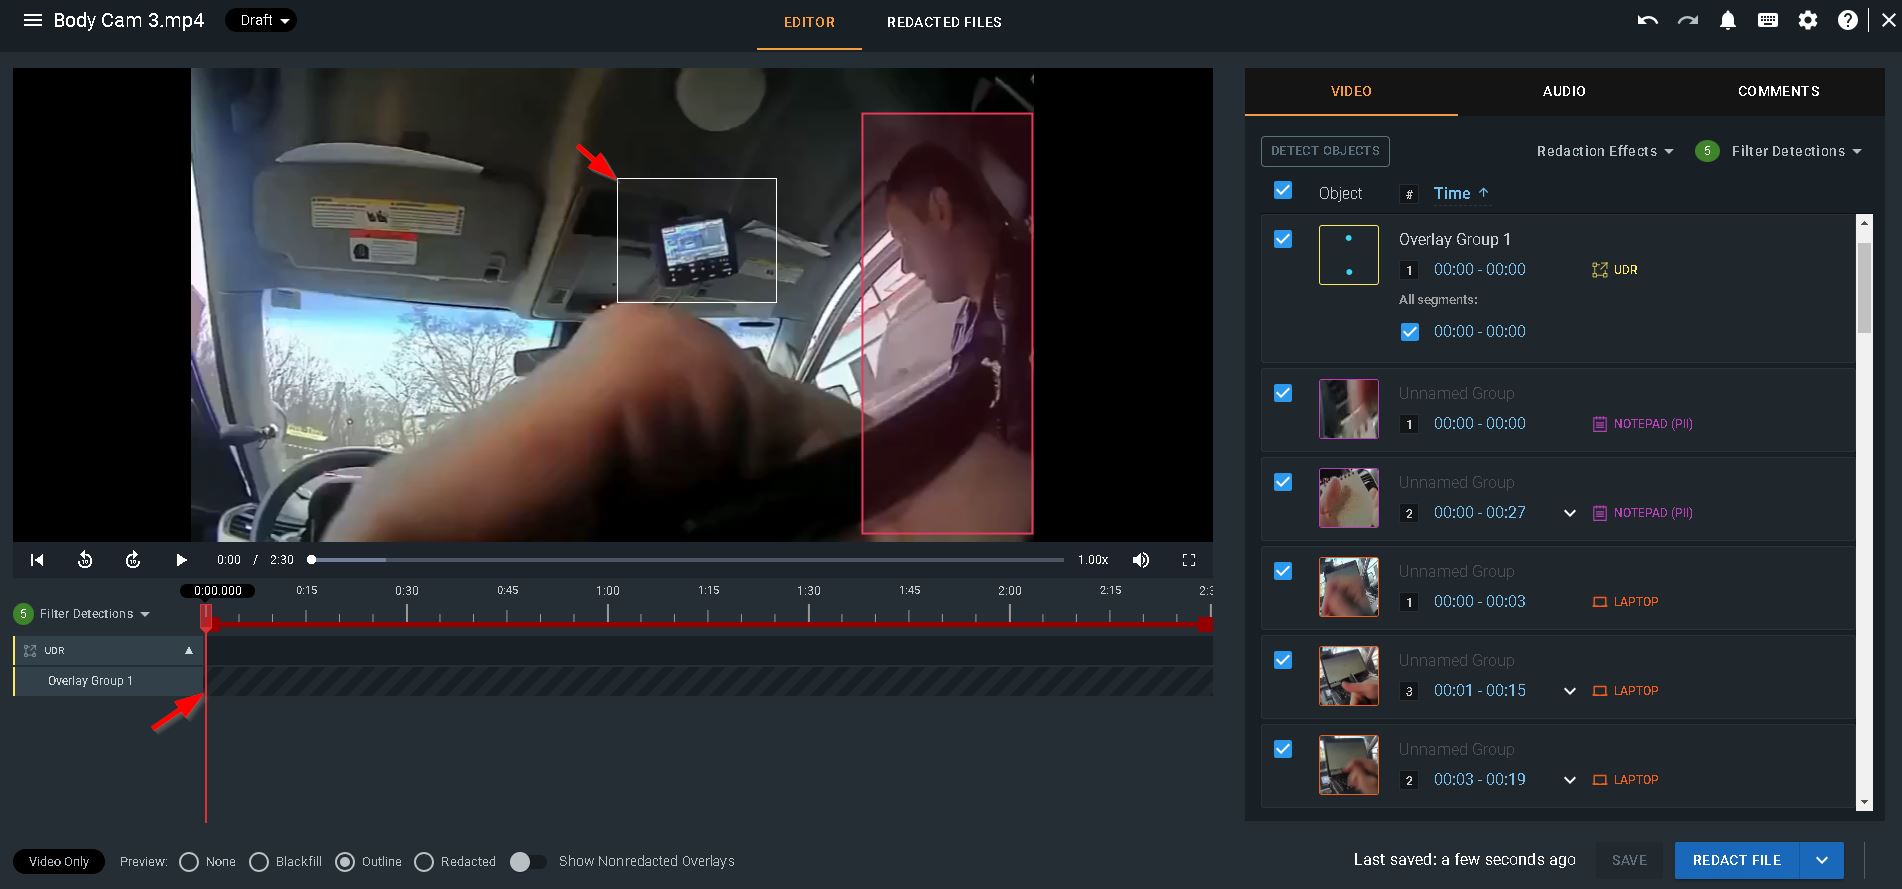
3. The outside of the UDR box changes from a yellow perimeter to a white one while tracking and the timeline will show tracking is processing. Once tracking is complete, you will receive a notification in the notification bell.
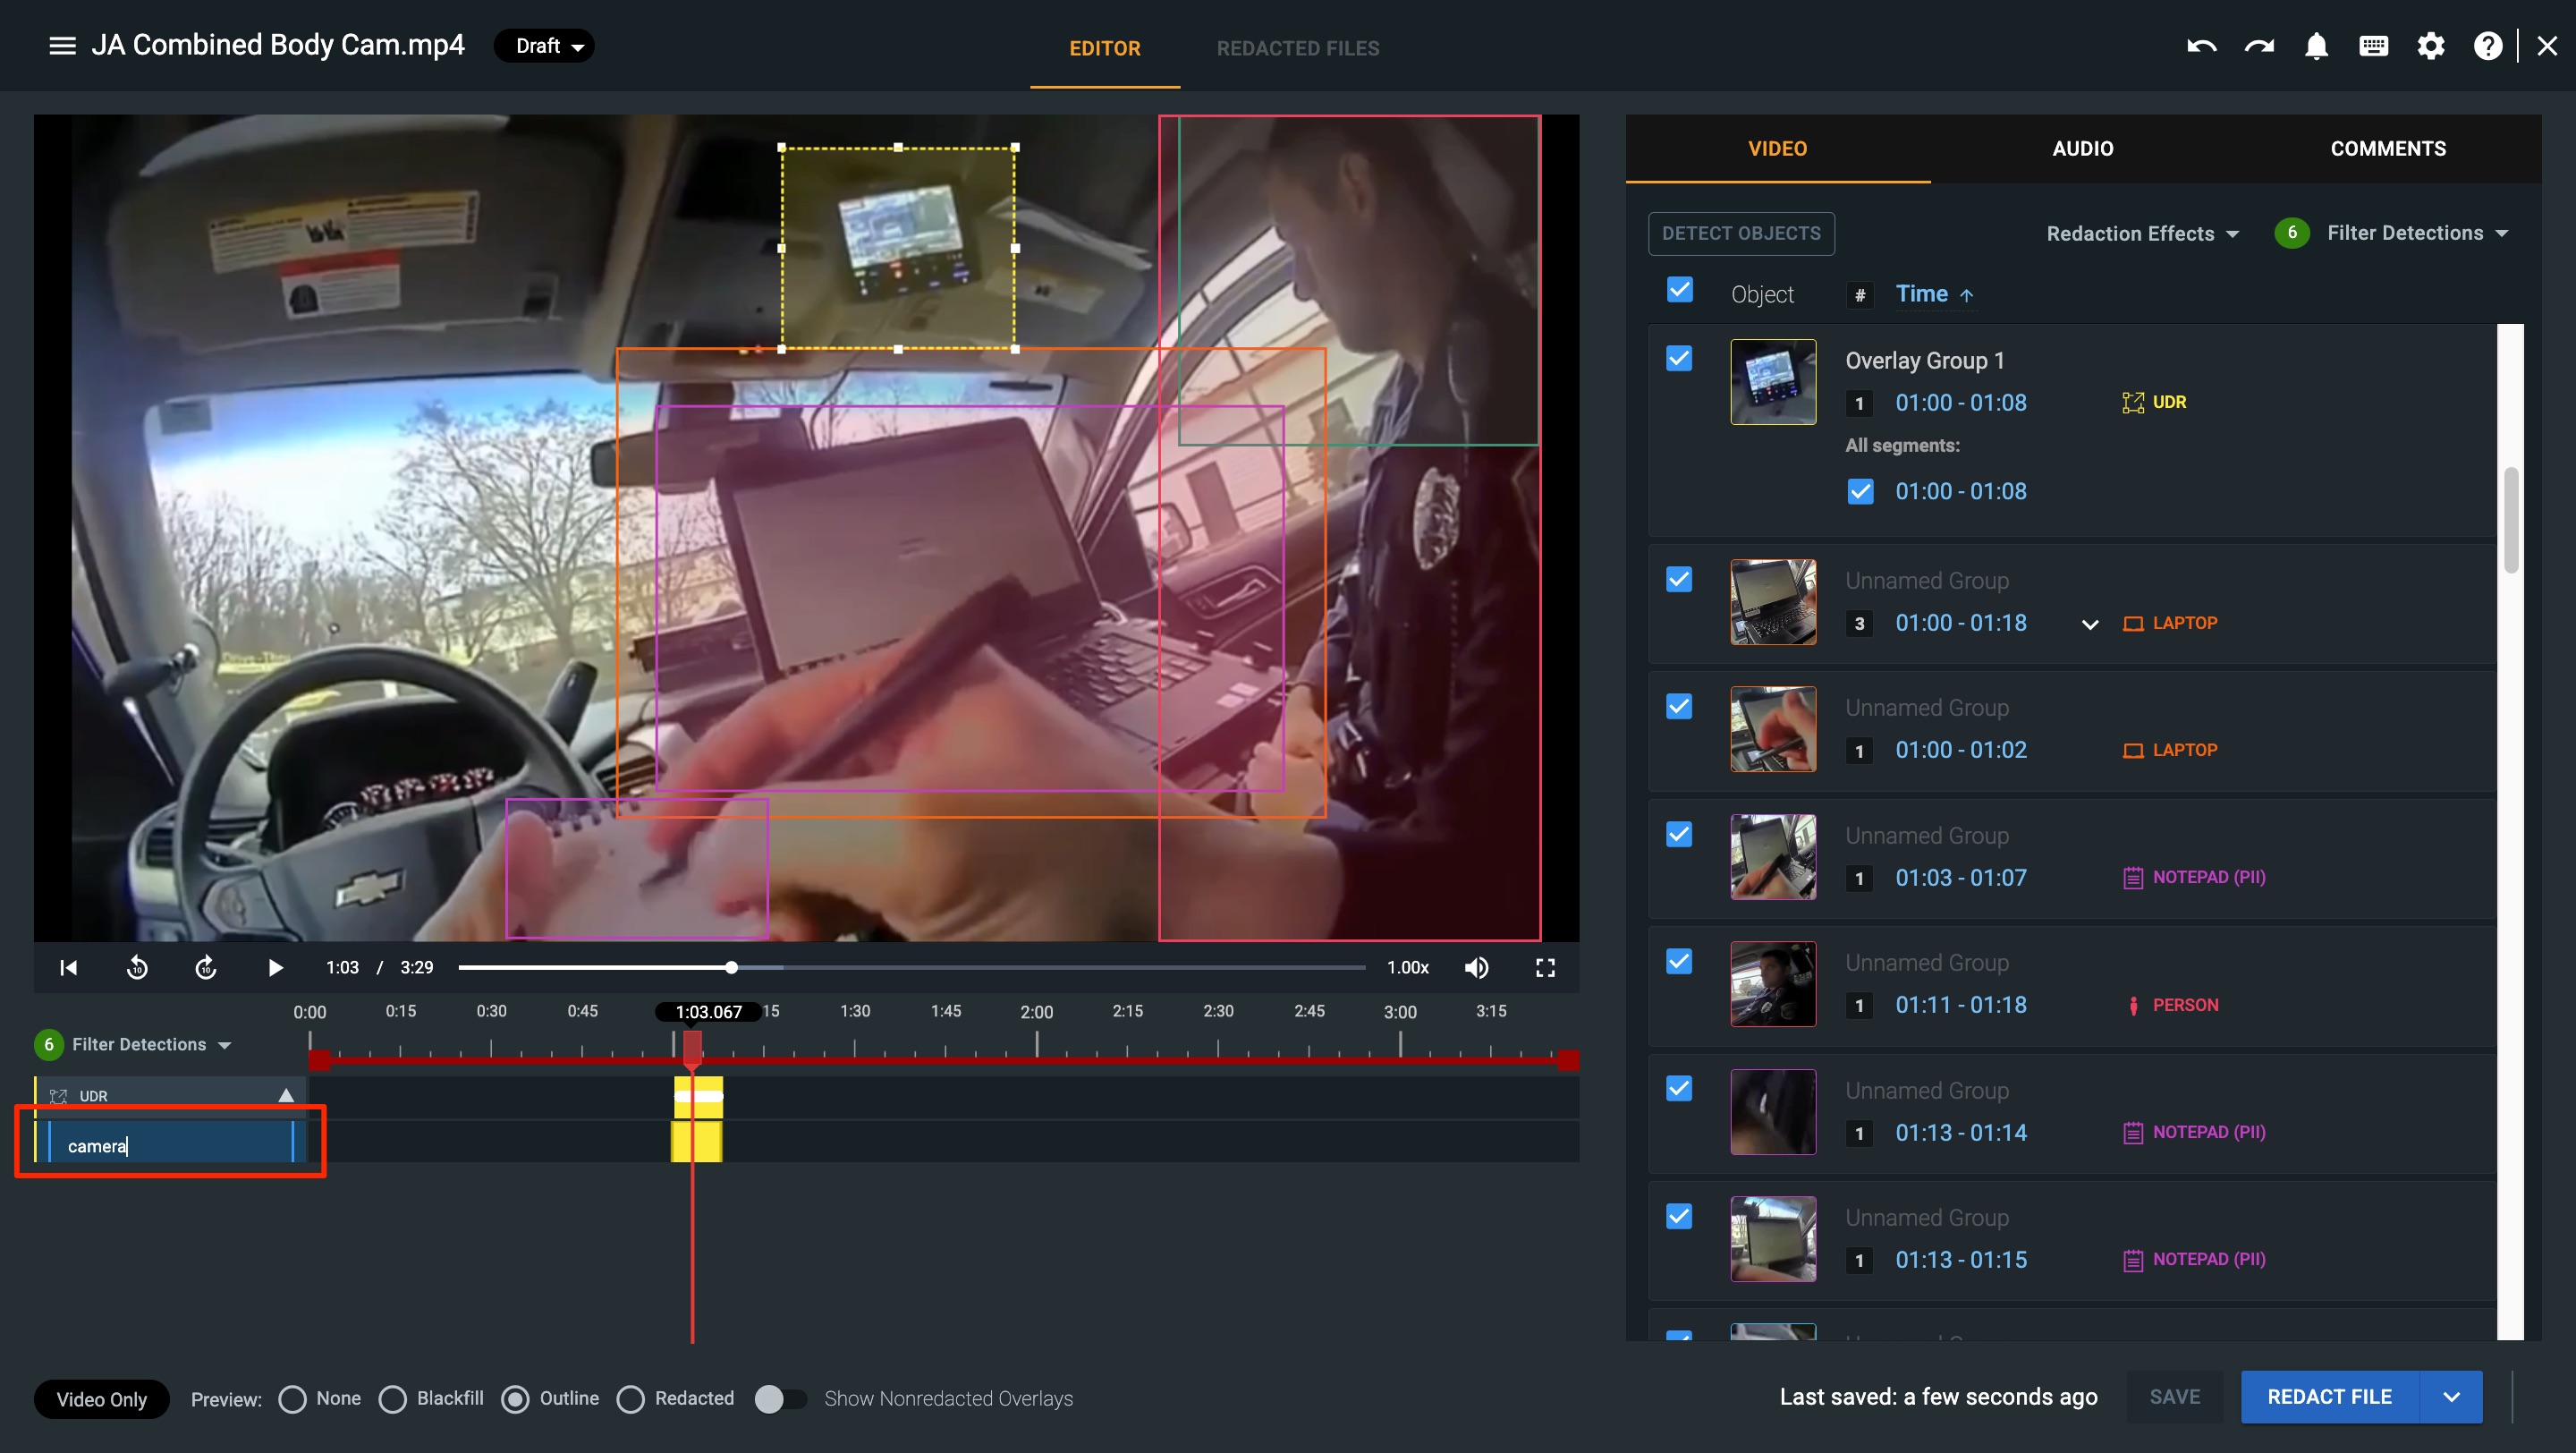
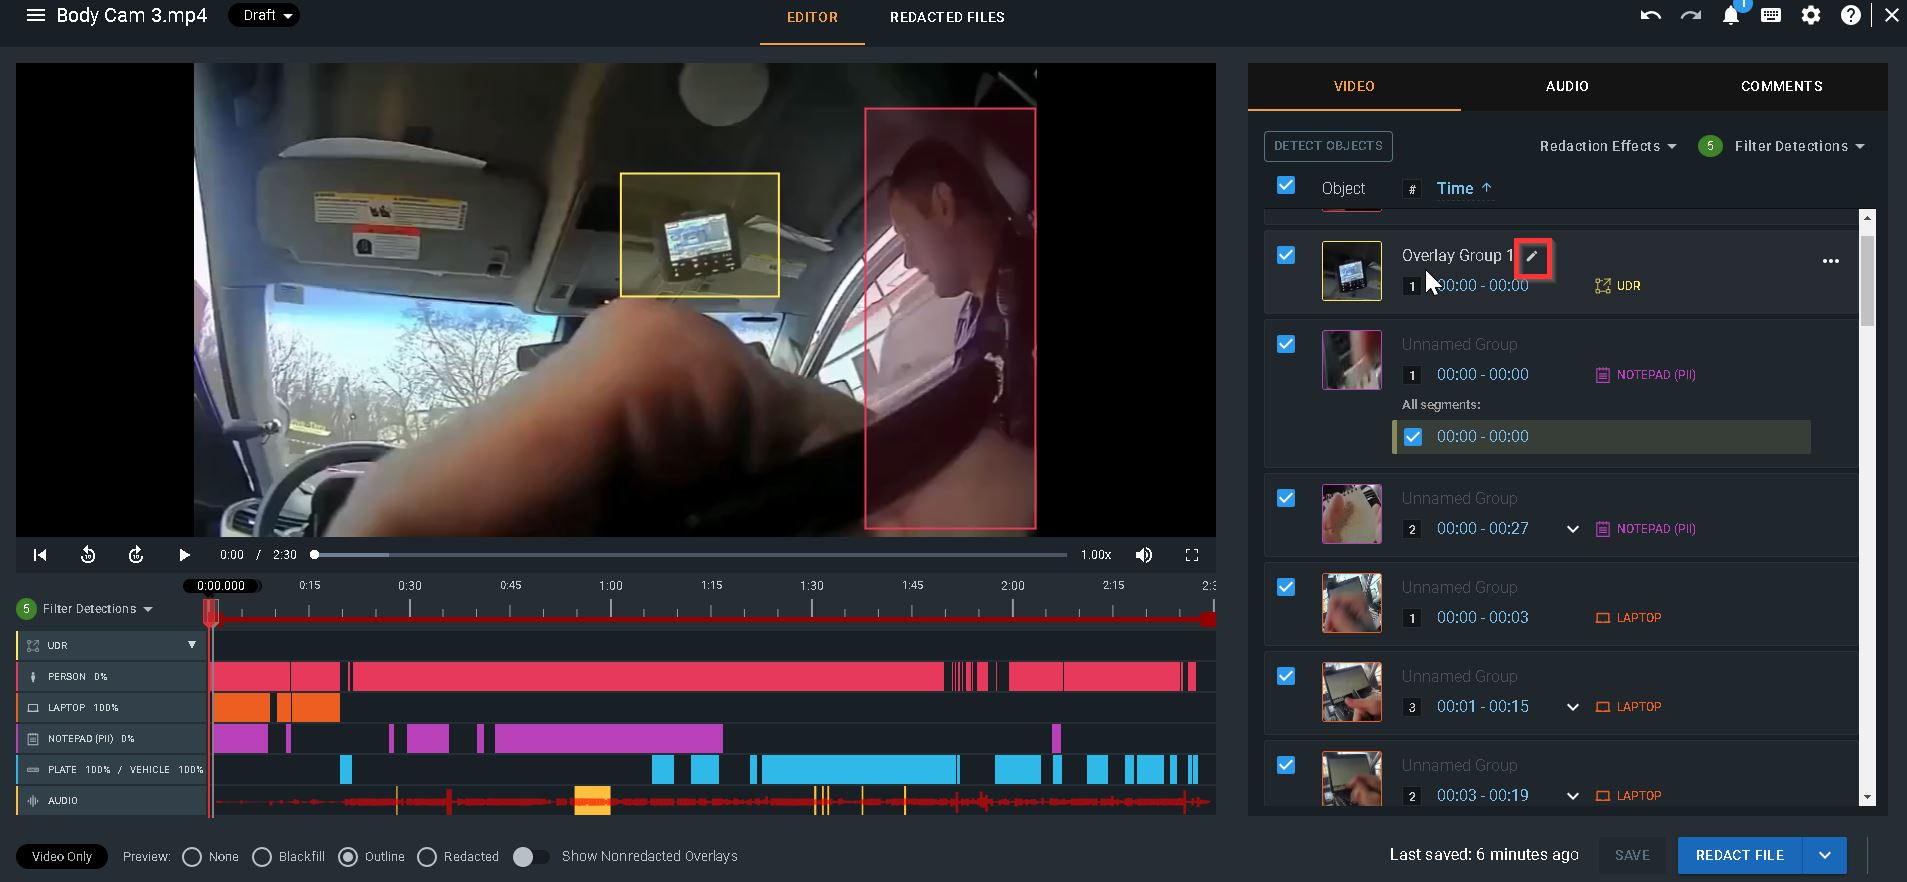
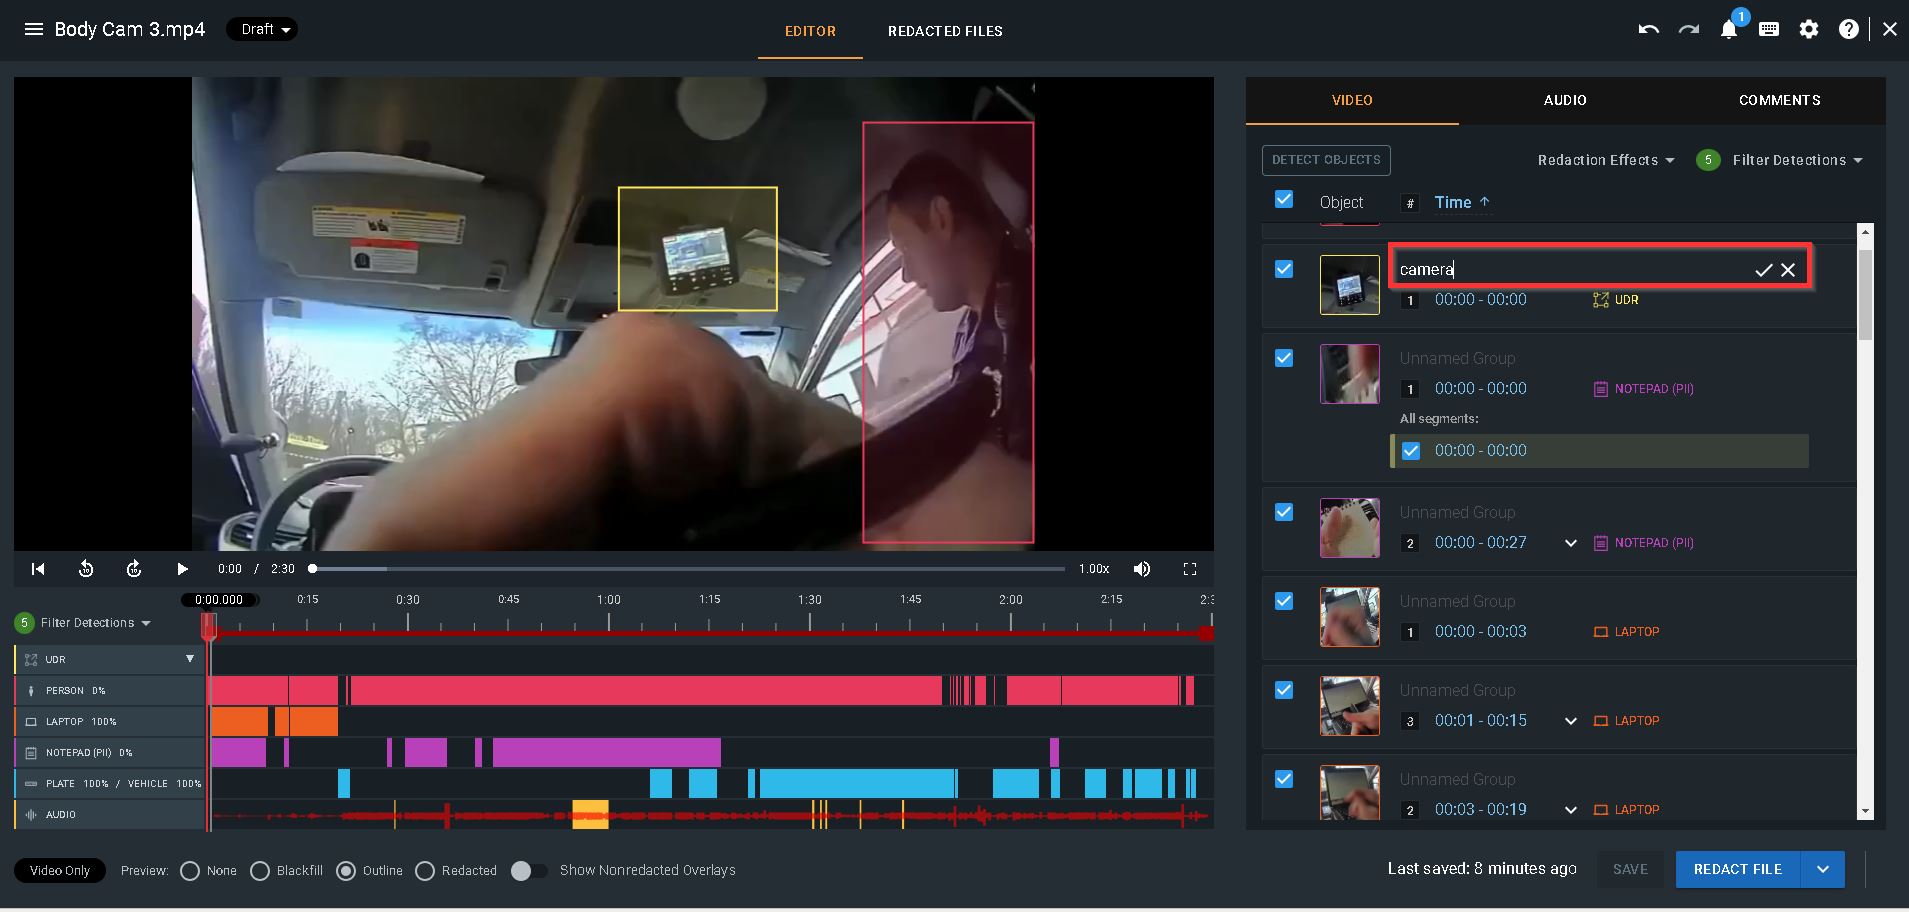
How to Rename an Overlay Group
By default, each UDR creates an overlay group named “Overlay Group 1,” “Overlay Group 2,” and so on. There are two ways to rename the “Overlay Group”:
1. Double click on the generic name, Overlay Group 1, in the UDR timeline. Type your new name and hit enter on your keyboard to save.
2. Locate your overlay group in the video panel, and select the pencil icon. Type your new name and click the checkmark or hit enter on your keyboard to save.
Adding Redactions to an Overlay Group
There may be times when you need to redact a single object, like a cellphone, multiple times throughout your media file. To organize your manual redactions, you can add multiple UDRs to a single overlay group.
1. After creating a new UDR, select the overlay group name from the timeline beneath your media player. This will then highlight the group in blue.
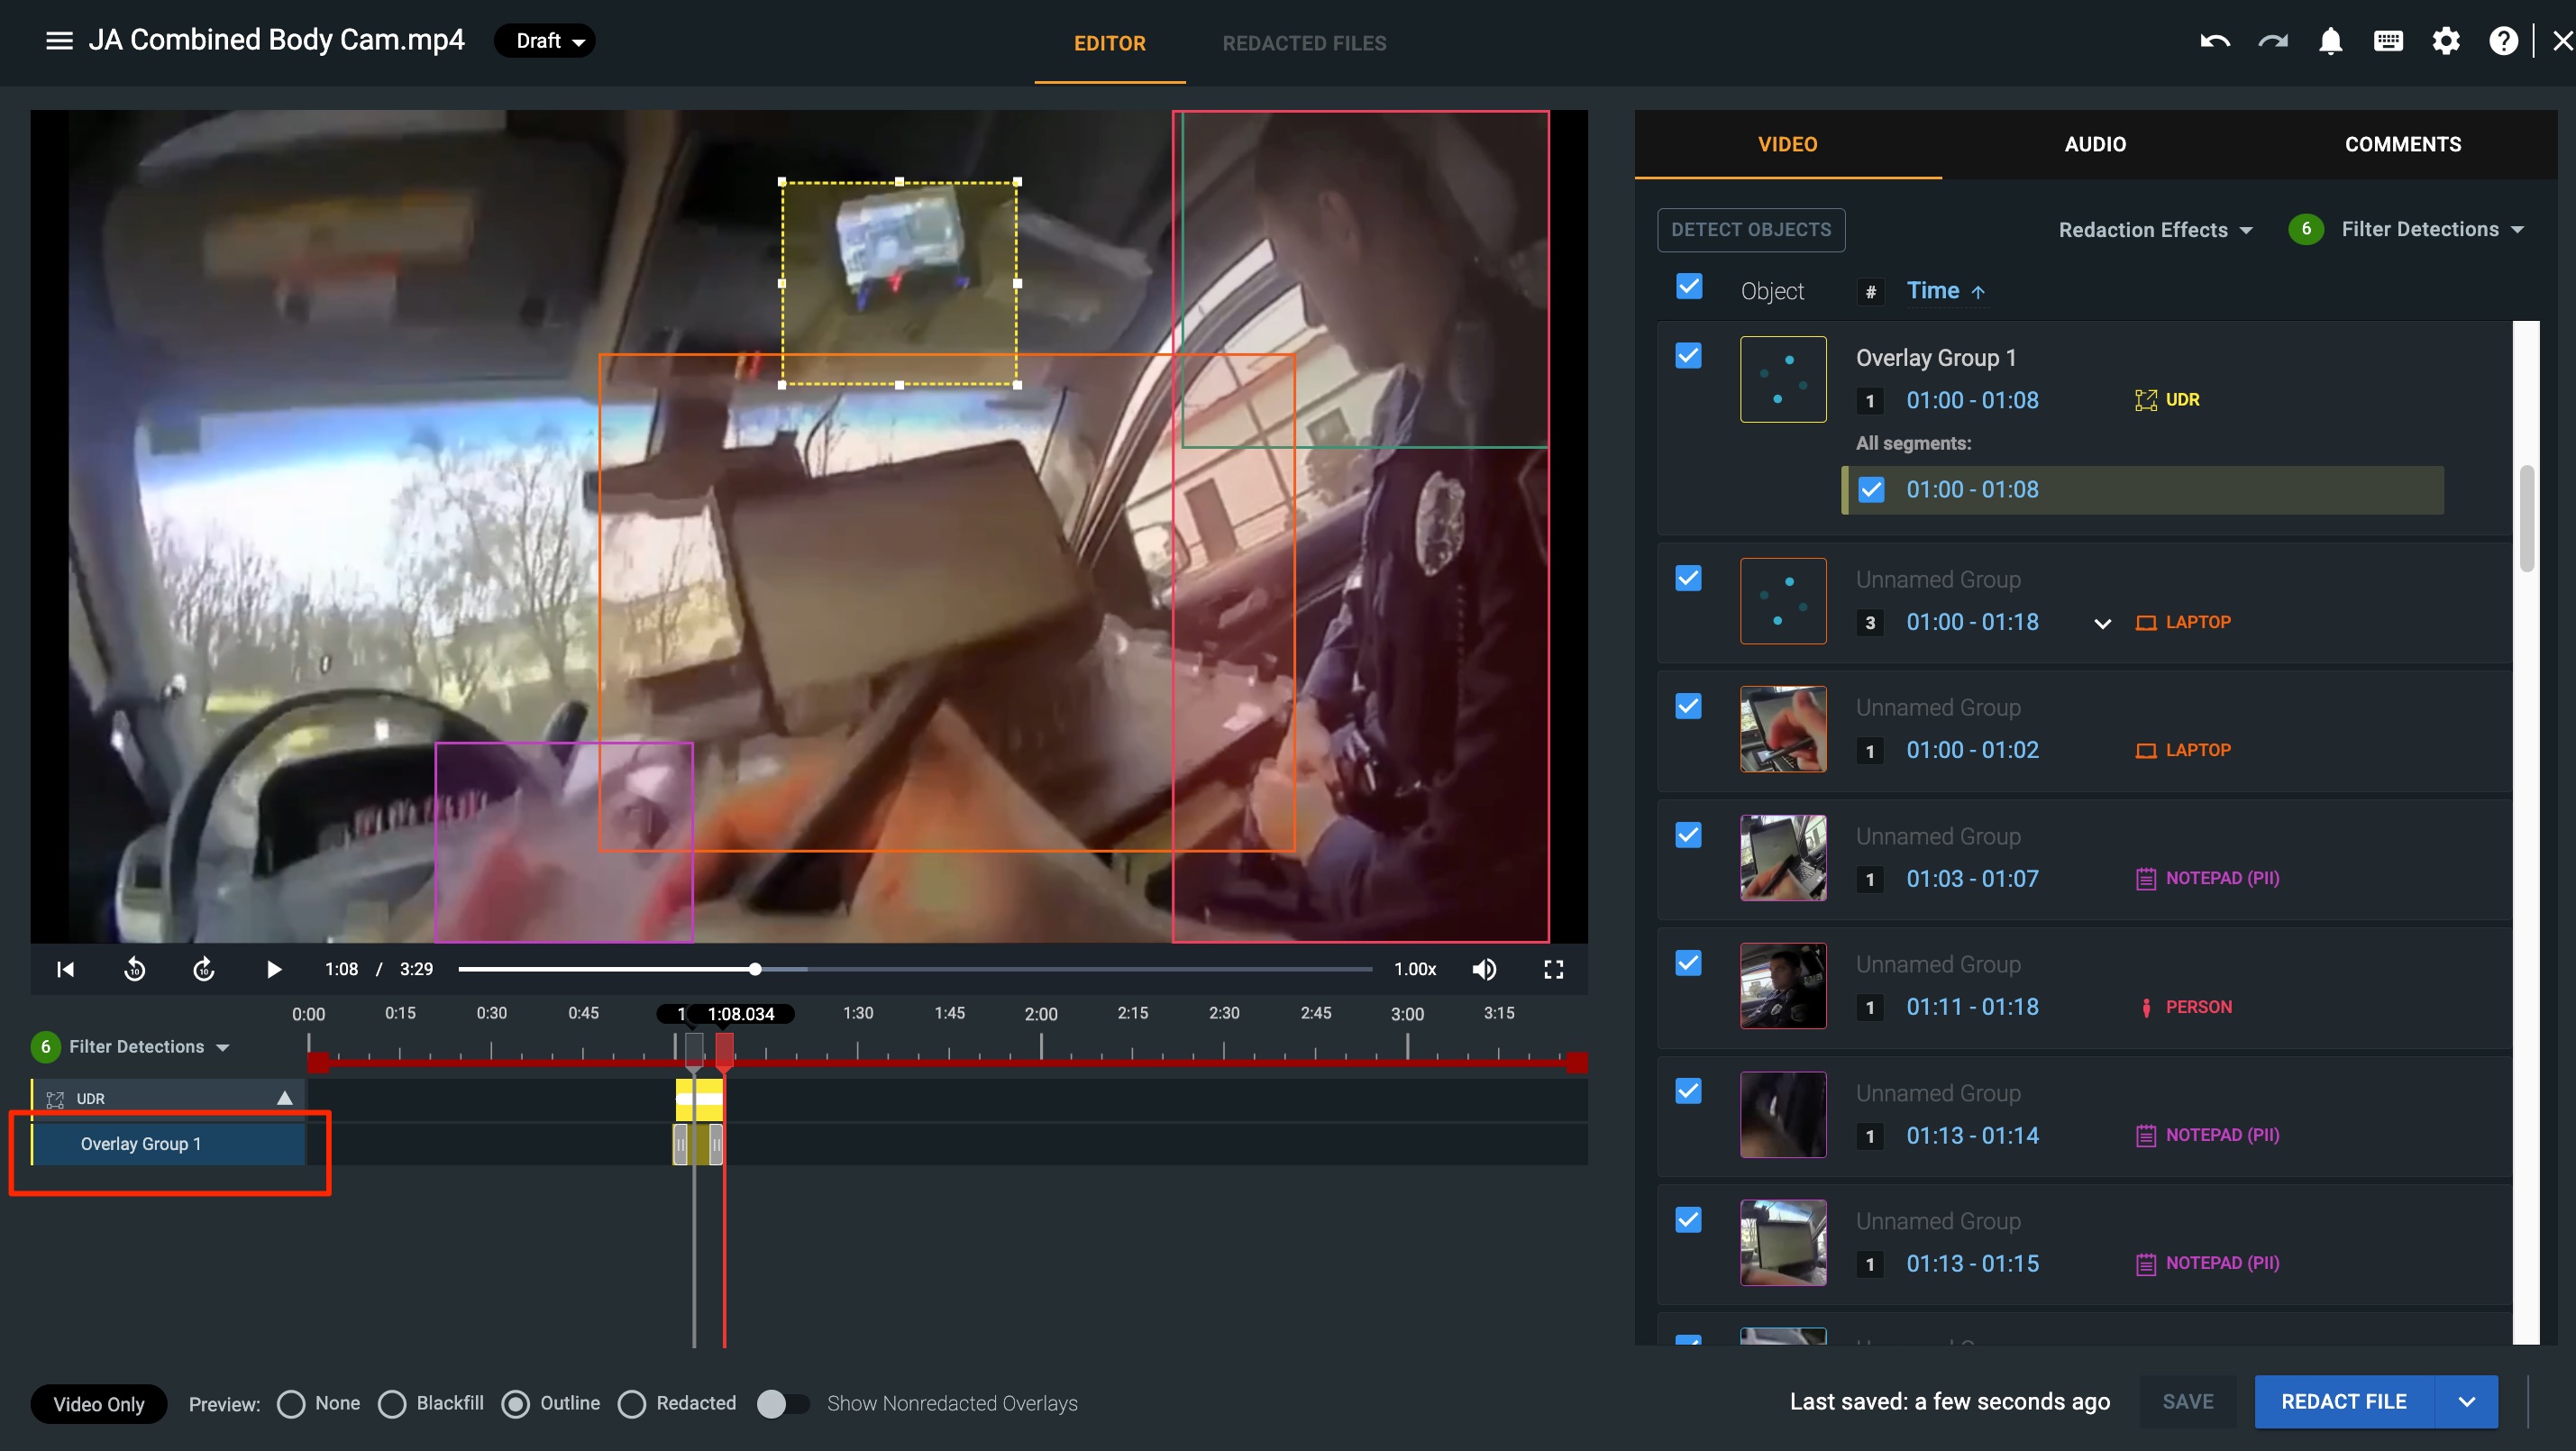
2. Draw your additional UDR box, which will populate in your media player with a dash line around the perimeter. Create either a live tracking UDR or a static UDR.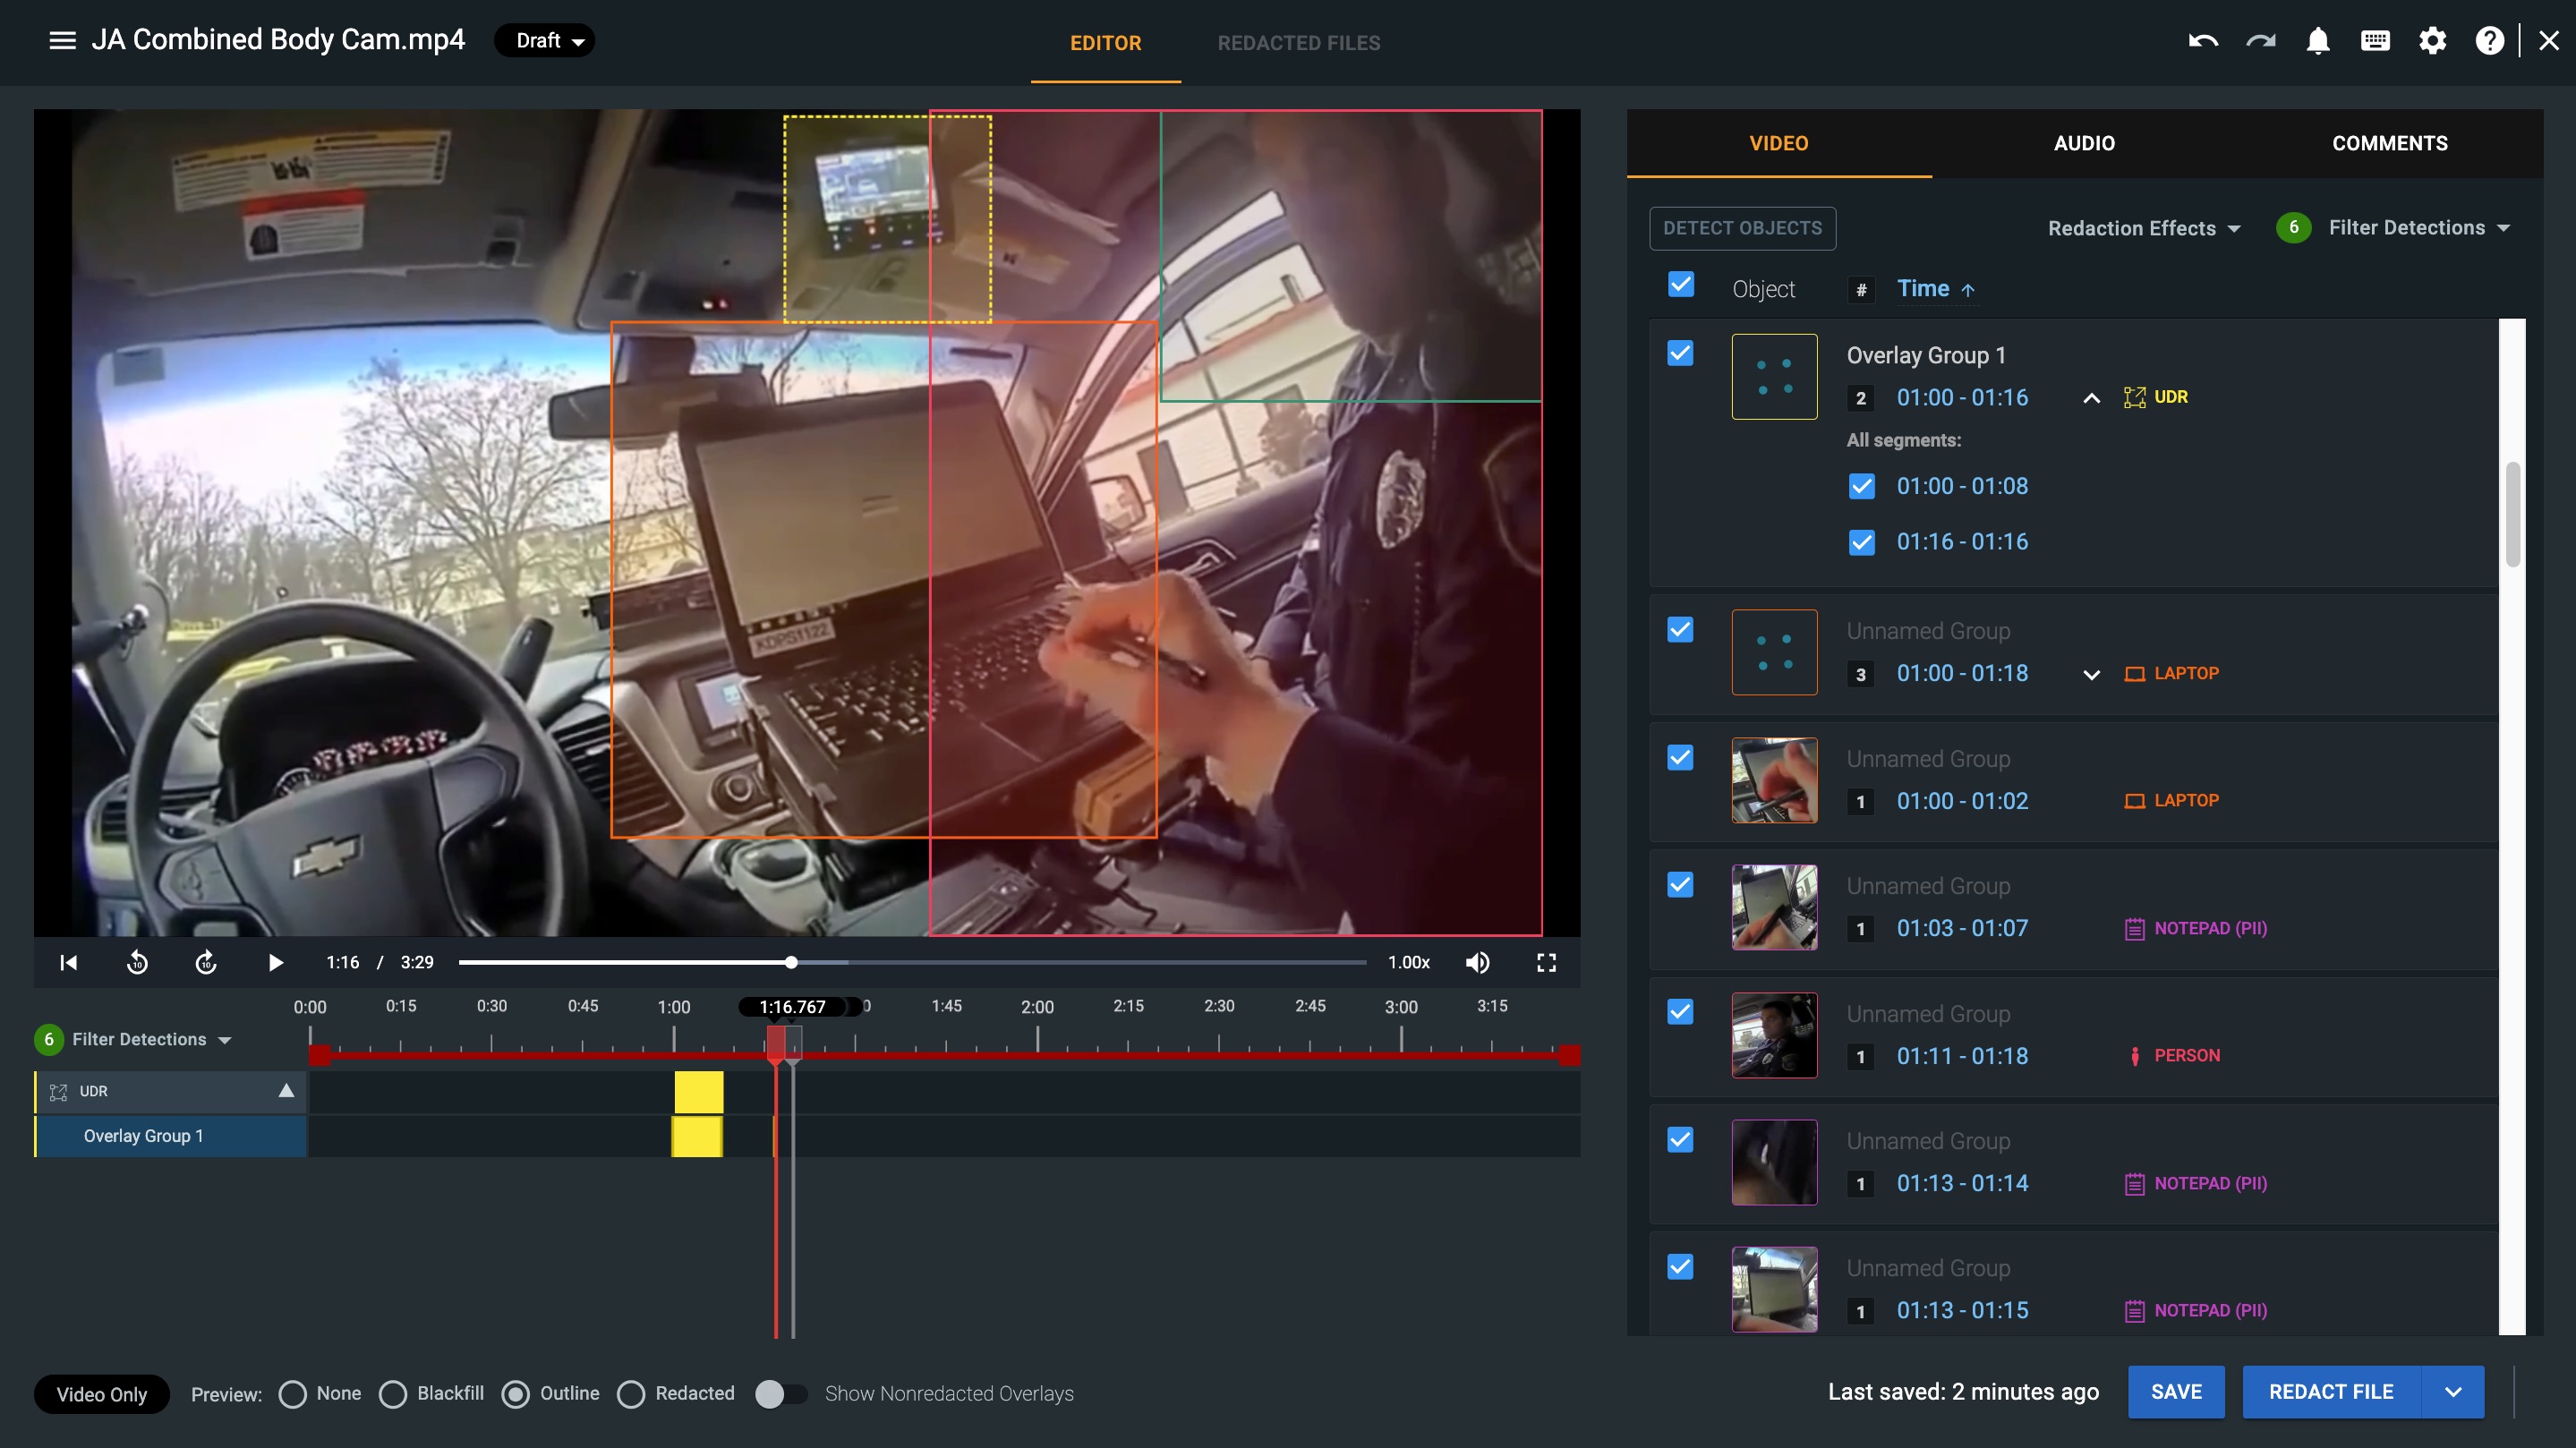
3. You will now see the second UDR within the selected timeline. Repeat this process as many times as needed.

Note: You can also merge your UDRs with other UDRs or other detection types to create custom detection groups. For more information, visit our help article Detection Groups.
If you have any questions about applying User-Defined Regions (UDRs), contact the Veritone Support team at Support@veritone.com.

