Campaigns correlate media playout source data with your advertiser's website traffic analytics. The data insights gathered can be visualized in the Dashboard Suite and can be downloaded to print or share with others. You can create multiple campaigns for simultaneous tracking.
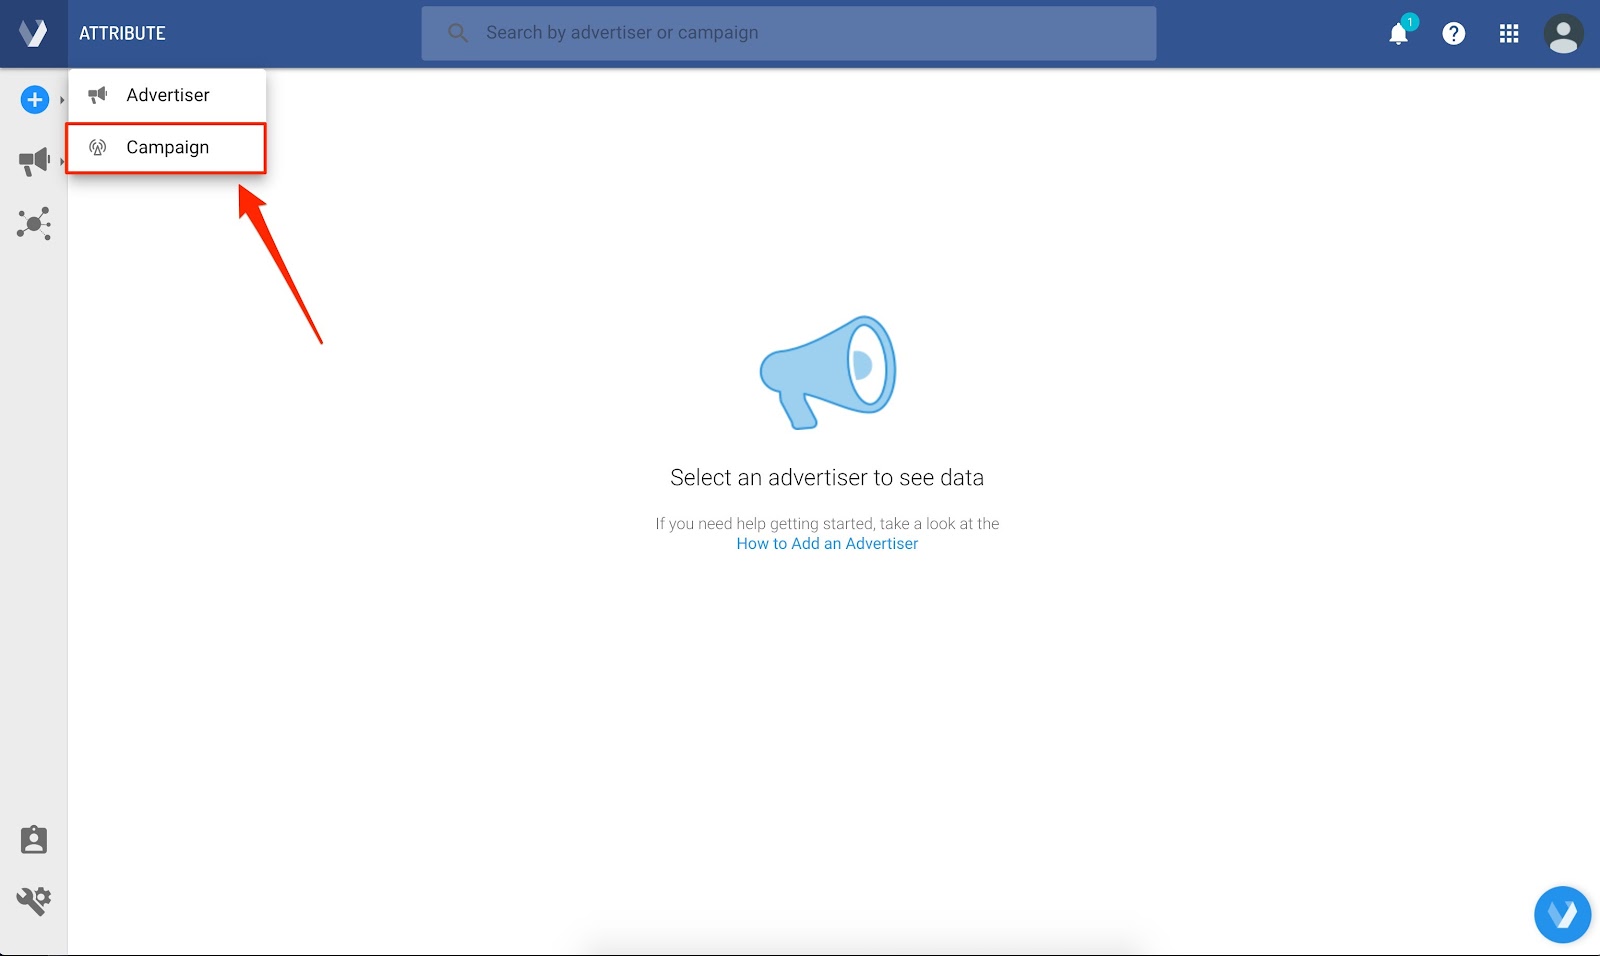
Create a new campaign
- In the top left corner of Attribute, click
 and then Campaign. A five-step Create Campaign page opens.
Step 1: Campaign details
- In the Campaign Name field, enter the name you would like to use for the campaign (i.e. Coffee Company Sponsorships).
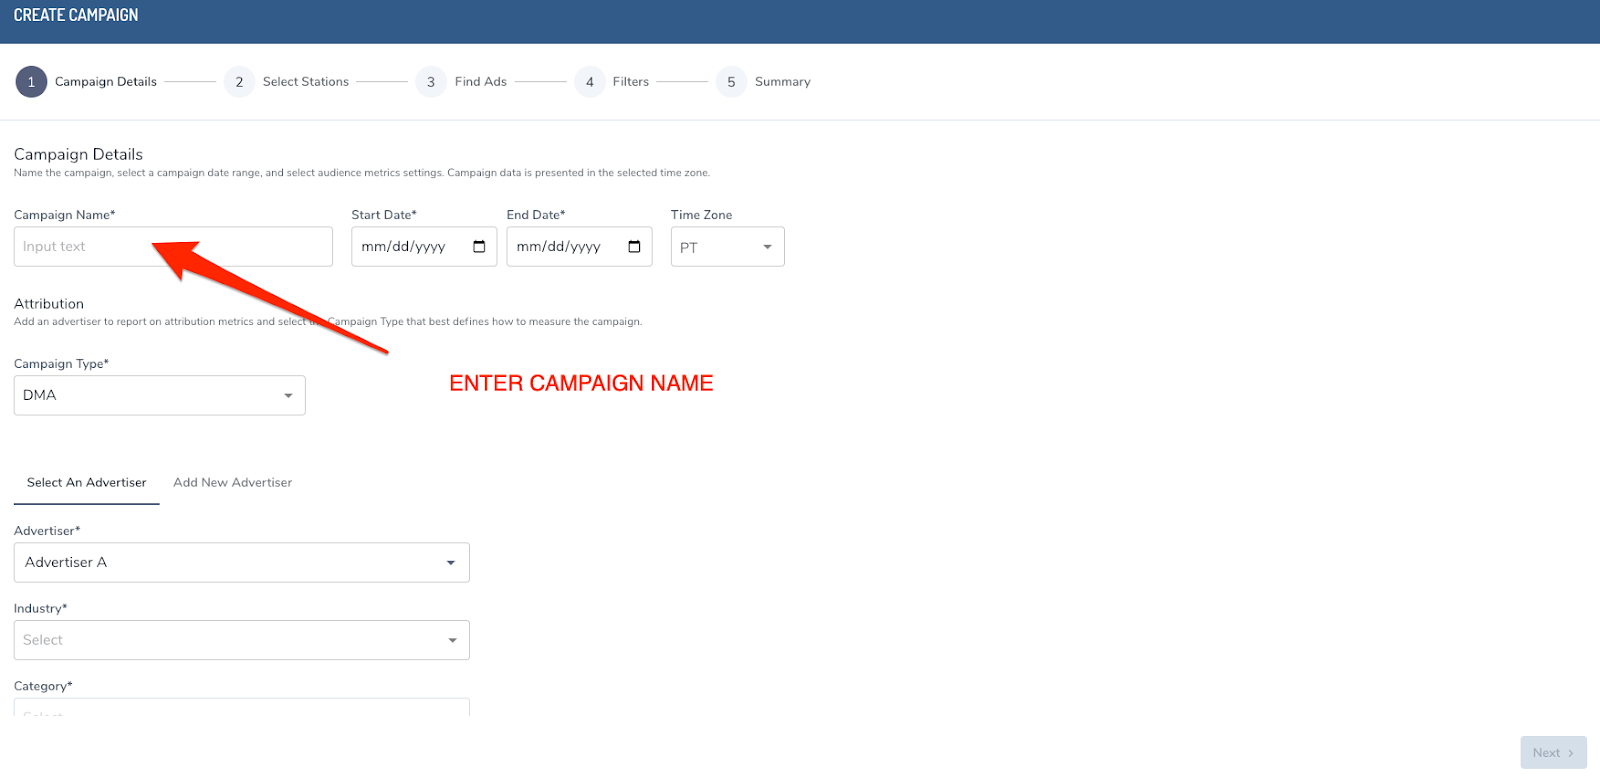
- In the dates fields, click the calendar icon to enter the start date and scroll down to select the end date, or you can manually type the date into the Start Date box. When the end date is selected, the calendar will automatically close.
- In the Campaign Type field, select either Metro, Designated Market Area (DMA), or Other to define the type of geographic media region associated with your campaign. If you are unsure of your campaign type, continue with the DMA selection.
- Select an Advertiser, Industry, and Category. You can also add a New Advertiser under the Add New Advertiser tab.
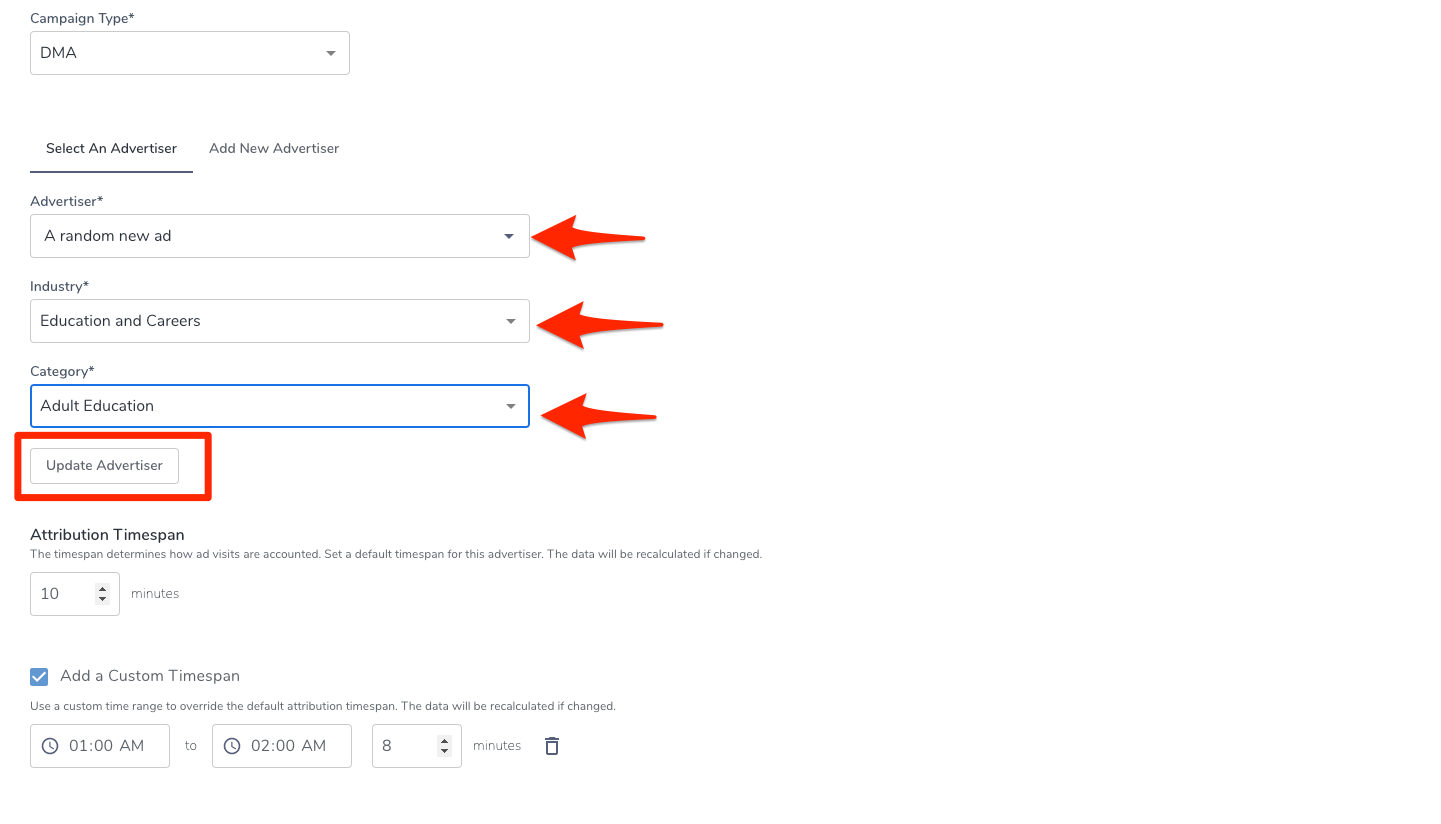
- Click Update Advertiser.
- The Attribution timespan shows the default timespan that Veritone Attribute will correlate the Advertiser website traffic to ads aired. Increase or decrease the number, or enter a new number.
You may also see that you have the option to add custom timespans by day part by clicking Add a Custom Timespan. You can limit a custom attribution window to a specific time of day.
To delete custom attribution windows that have been added, click the trash can icon to the right of the time fields.
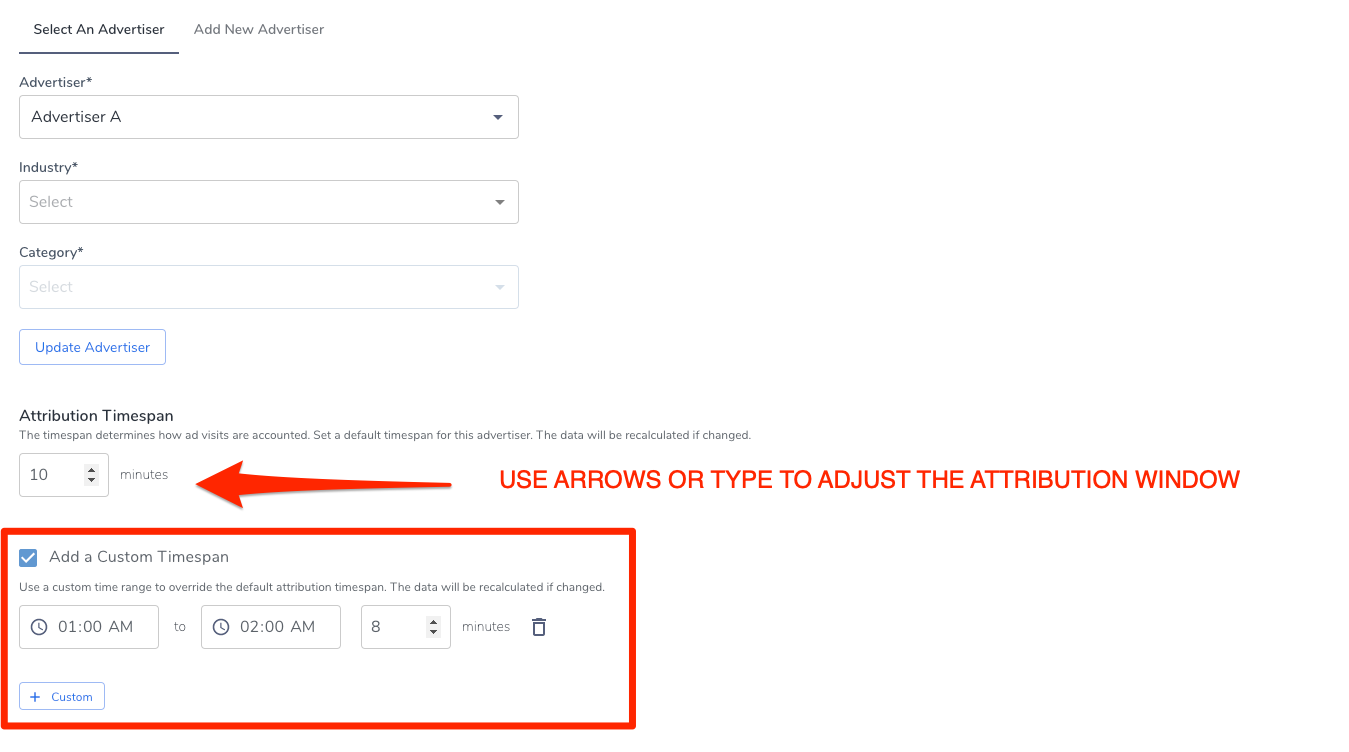
[Note]Depending on your organization, you may or may not have the option to adjust the default timespan. Ten minutes is currently the industry standard for website traffic attribution. If the attribution timespan is expanded or narrowed, results of your campaign could be skewed by attributing more or fewer advertiser website visits to the ads run.
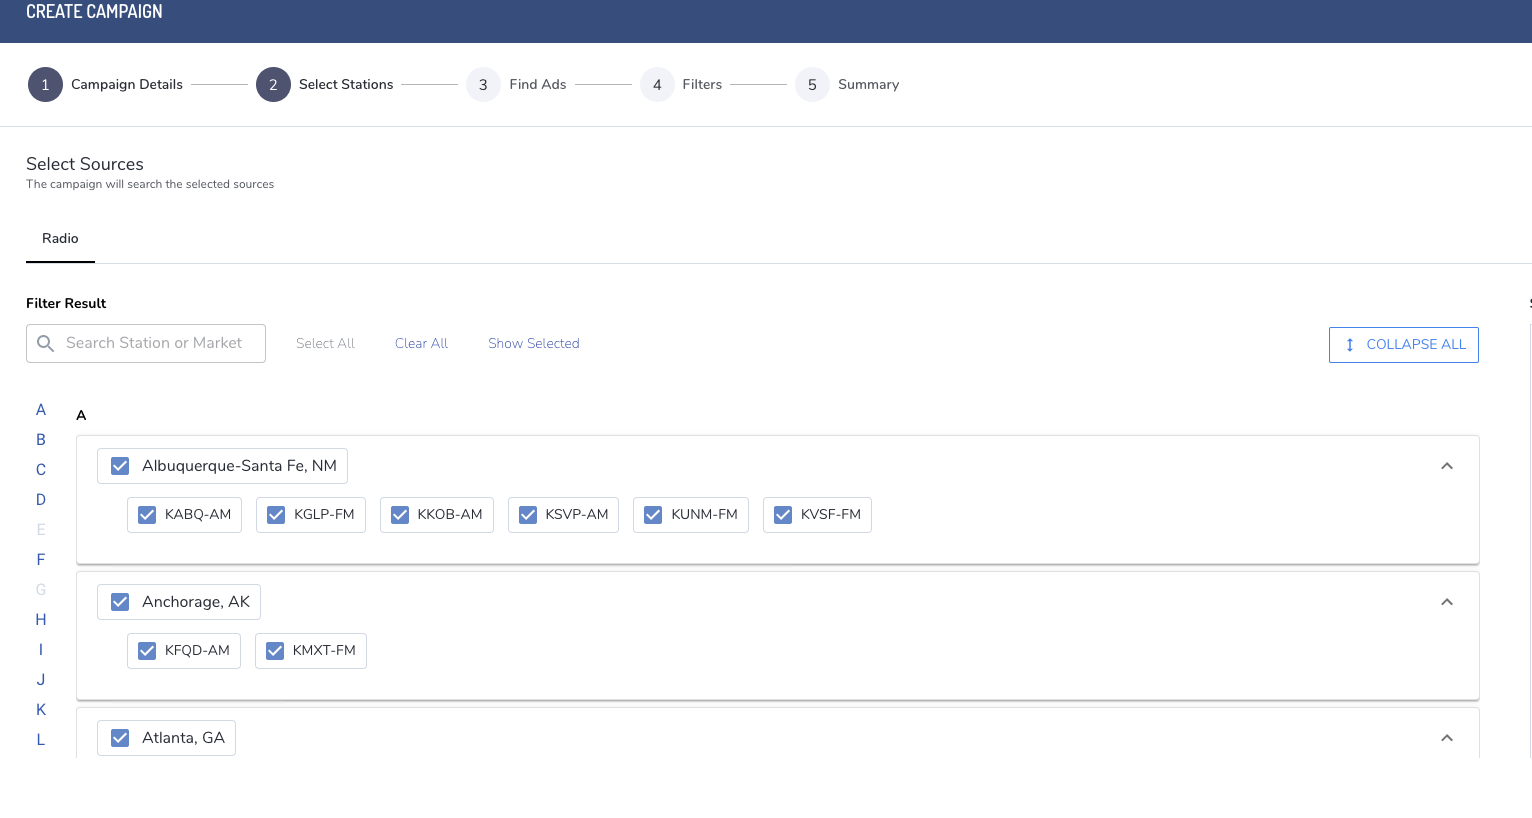
Step 2: Select stations
In the Select Stations tab, click the corresponding checkboxes to select stations. Once you've selected all stations relevant to this campaign, scroll down on the page and click Next.
Step 3: Find ads
In this step, you'll set up the campaign search criteria to find ads according to type.
- Use the “Locate Pre-Recorded Spots” option to find ads by searching data from your traffic system (i.e., the station traffic logs).
-
- Click into the search bar under "Locate Pre-Recorded Spots" to open the Search by Structured data pop-up window. The search is preconfigured to search for “Advertiser Name contains _________” and the cursor is automatically placed into the empty field.
- To search by advertiser name, type the advertiser’s name exactly as it appears in your traffic log.
- Click Add and then Close to view a preview of your results.
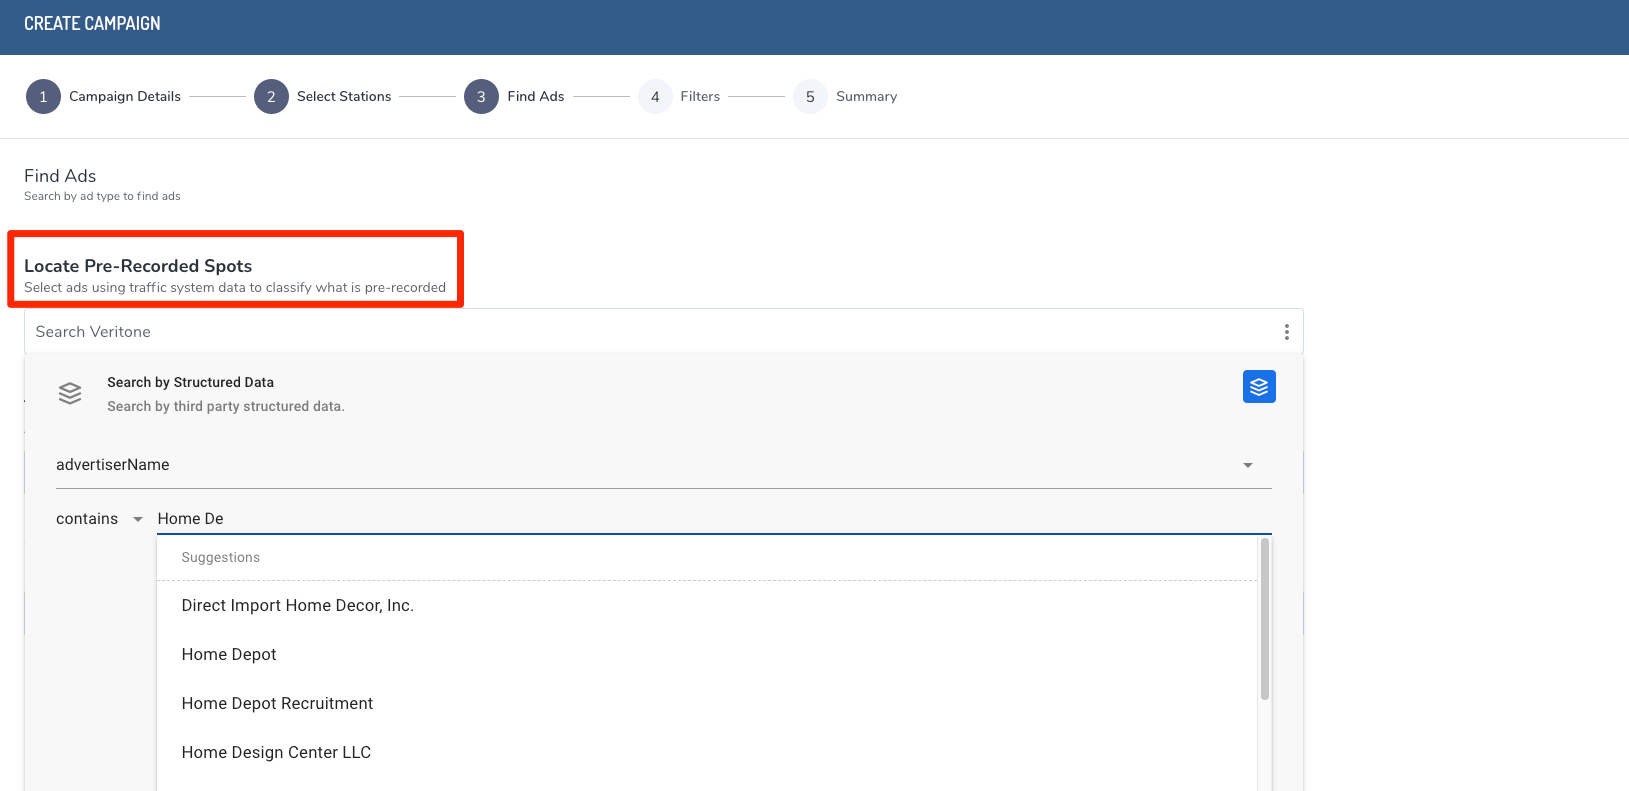
[Note]Station traffic log formatting can vary across traffic log providers. This sometimes results in unexpected ad search results in Attribute. You may find it helpful to experiment with other fields on the Structured Data list in order to find a specific creative (e.g., change between “Advertiser Name,” “Event Name,” “Artist Name," etc.). For more, see
Search query best practices.
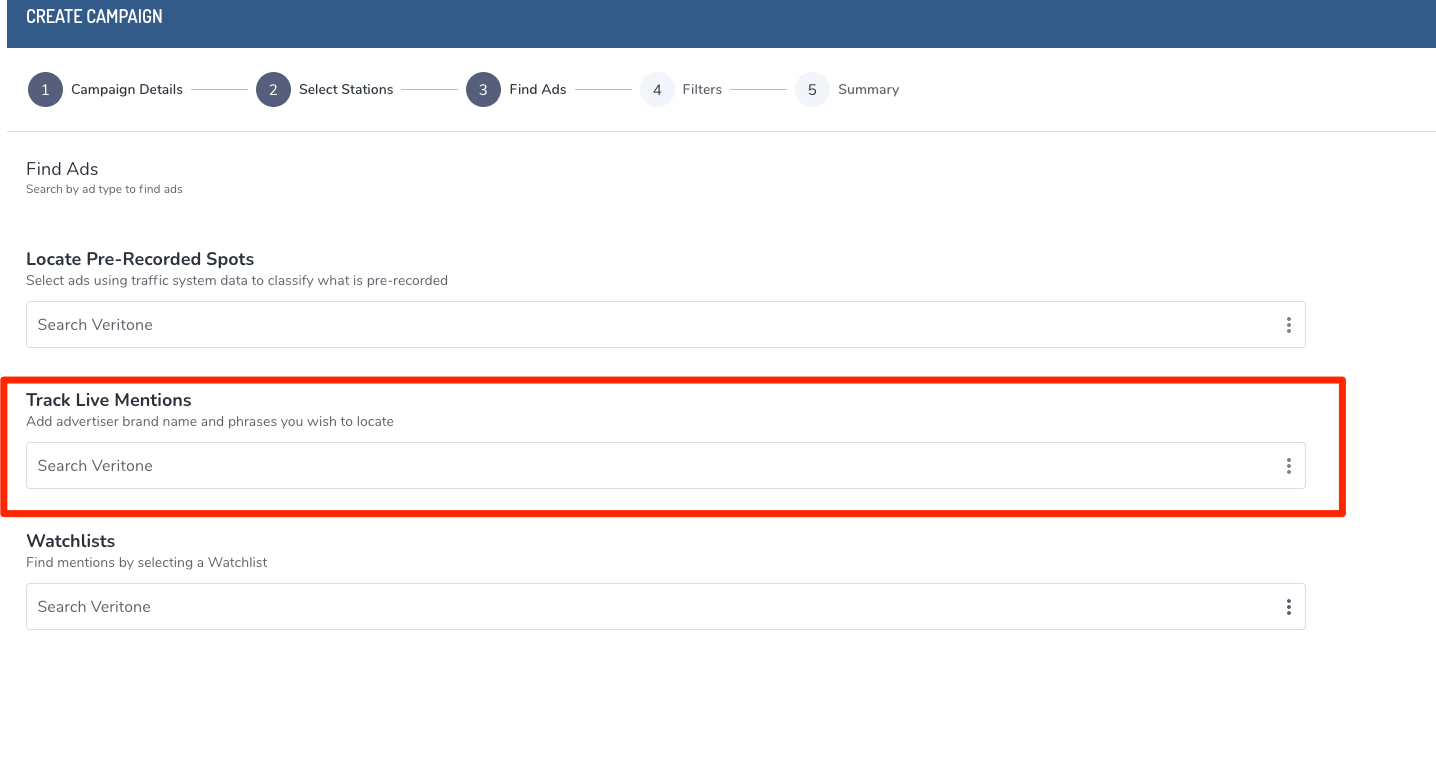
- If your campaign contains live reads (live, on-air DJ chatter not listed in the traffic logs), use the “Track Live Mentions” option to find ads by searching the transcripts of the broadcast feed by keyword or phrase.
-
- Type a keyword or phrase into the search bar. Use quotations when searching for terms longer than one word. For more search tips, please see Search query best practices.
- Click Add to view the preview pane and then Done to close out the window.
- Once you are satisfied with the search terms, click Next to proceed to next step, Filters.
Step 4: Filters
Location and Channel data is currently unavailable with GA4. Contact your Customer Success Manager or support@veritone.com for more information.
For Pixel connections, you must enable all traffic channels in order for any web data to display. If you do not enable all channels then no web data displays and an error message appears. See AT-CORENG-02 Error displays after a successful web data connection to enable web data.
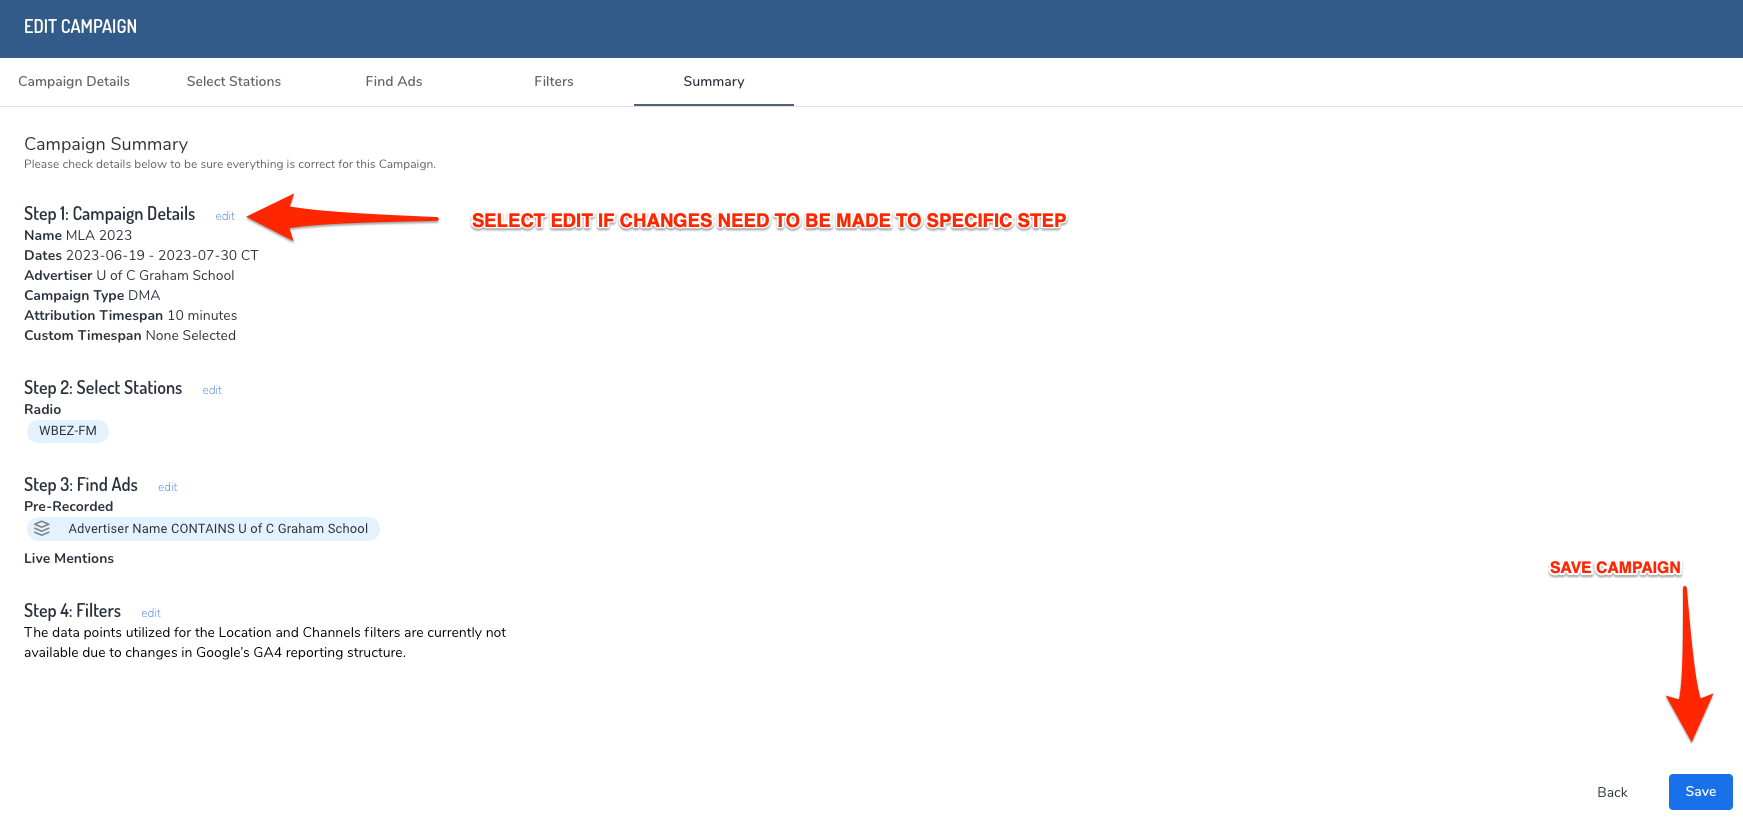
Step 5: Summary
The Summary tab shows all of your campaign search criteria. Click Edit to revisit the steps as needed and click Save when ready.
If you have any questions on how to enter live read copy keywords or finding creative in your logs, reach out to Support.

