Veritone Attribute Pixel is a small snippet of code owned and generated by Veritone that allows you to gather information about visitation to a site and visitors on a site.
There are two methods for Pixel installation:
- Installing using Google Tag Manager (GTM) (steps below)
- Install Pixel code directly
Regardless of your method, installation will vary depending on the website builder you use. You can deploy the tag onto the entire site or just individual pages you want to gather site visitation data on.
[Note]Pixel is only available to Veritone customers in the US.
Before you begin
-
Have your Attribute Pixel URL ready from your broadcast partner, who will invite you via email with the URL.
-
Have your webmaster or website service ready to install container codes. This may require backend site access. We provide general instructions below.
Steps
1. Create a Google Tag Manager account
Google Tag Manager is a Google service that allows you to set and install tracking codes on your website or mobile app. To create a new account:
- Navigate to Google Tag Manager.
-
Click Accounts > Create account.
-
Enter an account name and select the country for the account.
-
If desired, enter a container name and select the container type. Click Create and agree to the Terms of Service. A pop up window shows your header and footer container code. You can add it to your site now, or after the Pixel tag is configured. For information about adding it to your site, see step 3 below.
2. Create the Pixel tag
-
In your Google Tag Manager workspace, click the URL of the account that you want to add the tracking Pixel to. The workspace for the site opens.
-
Click Tags on the left panel and then the New button.
-
Click Tag Configuration. The Choose tag type panel opens. Select Custom Image.
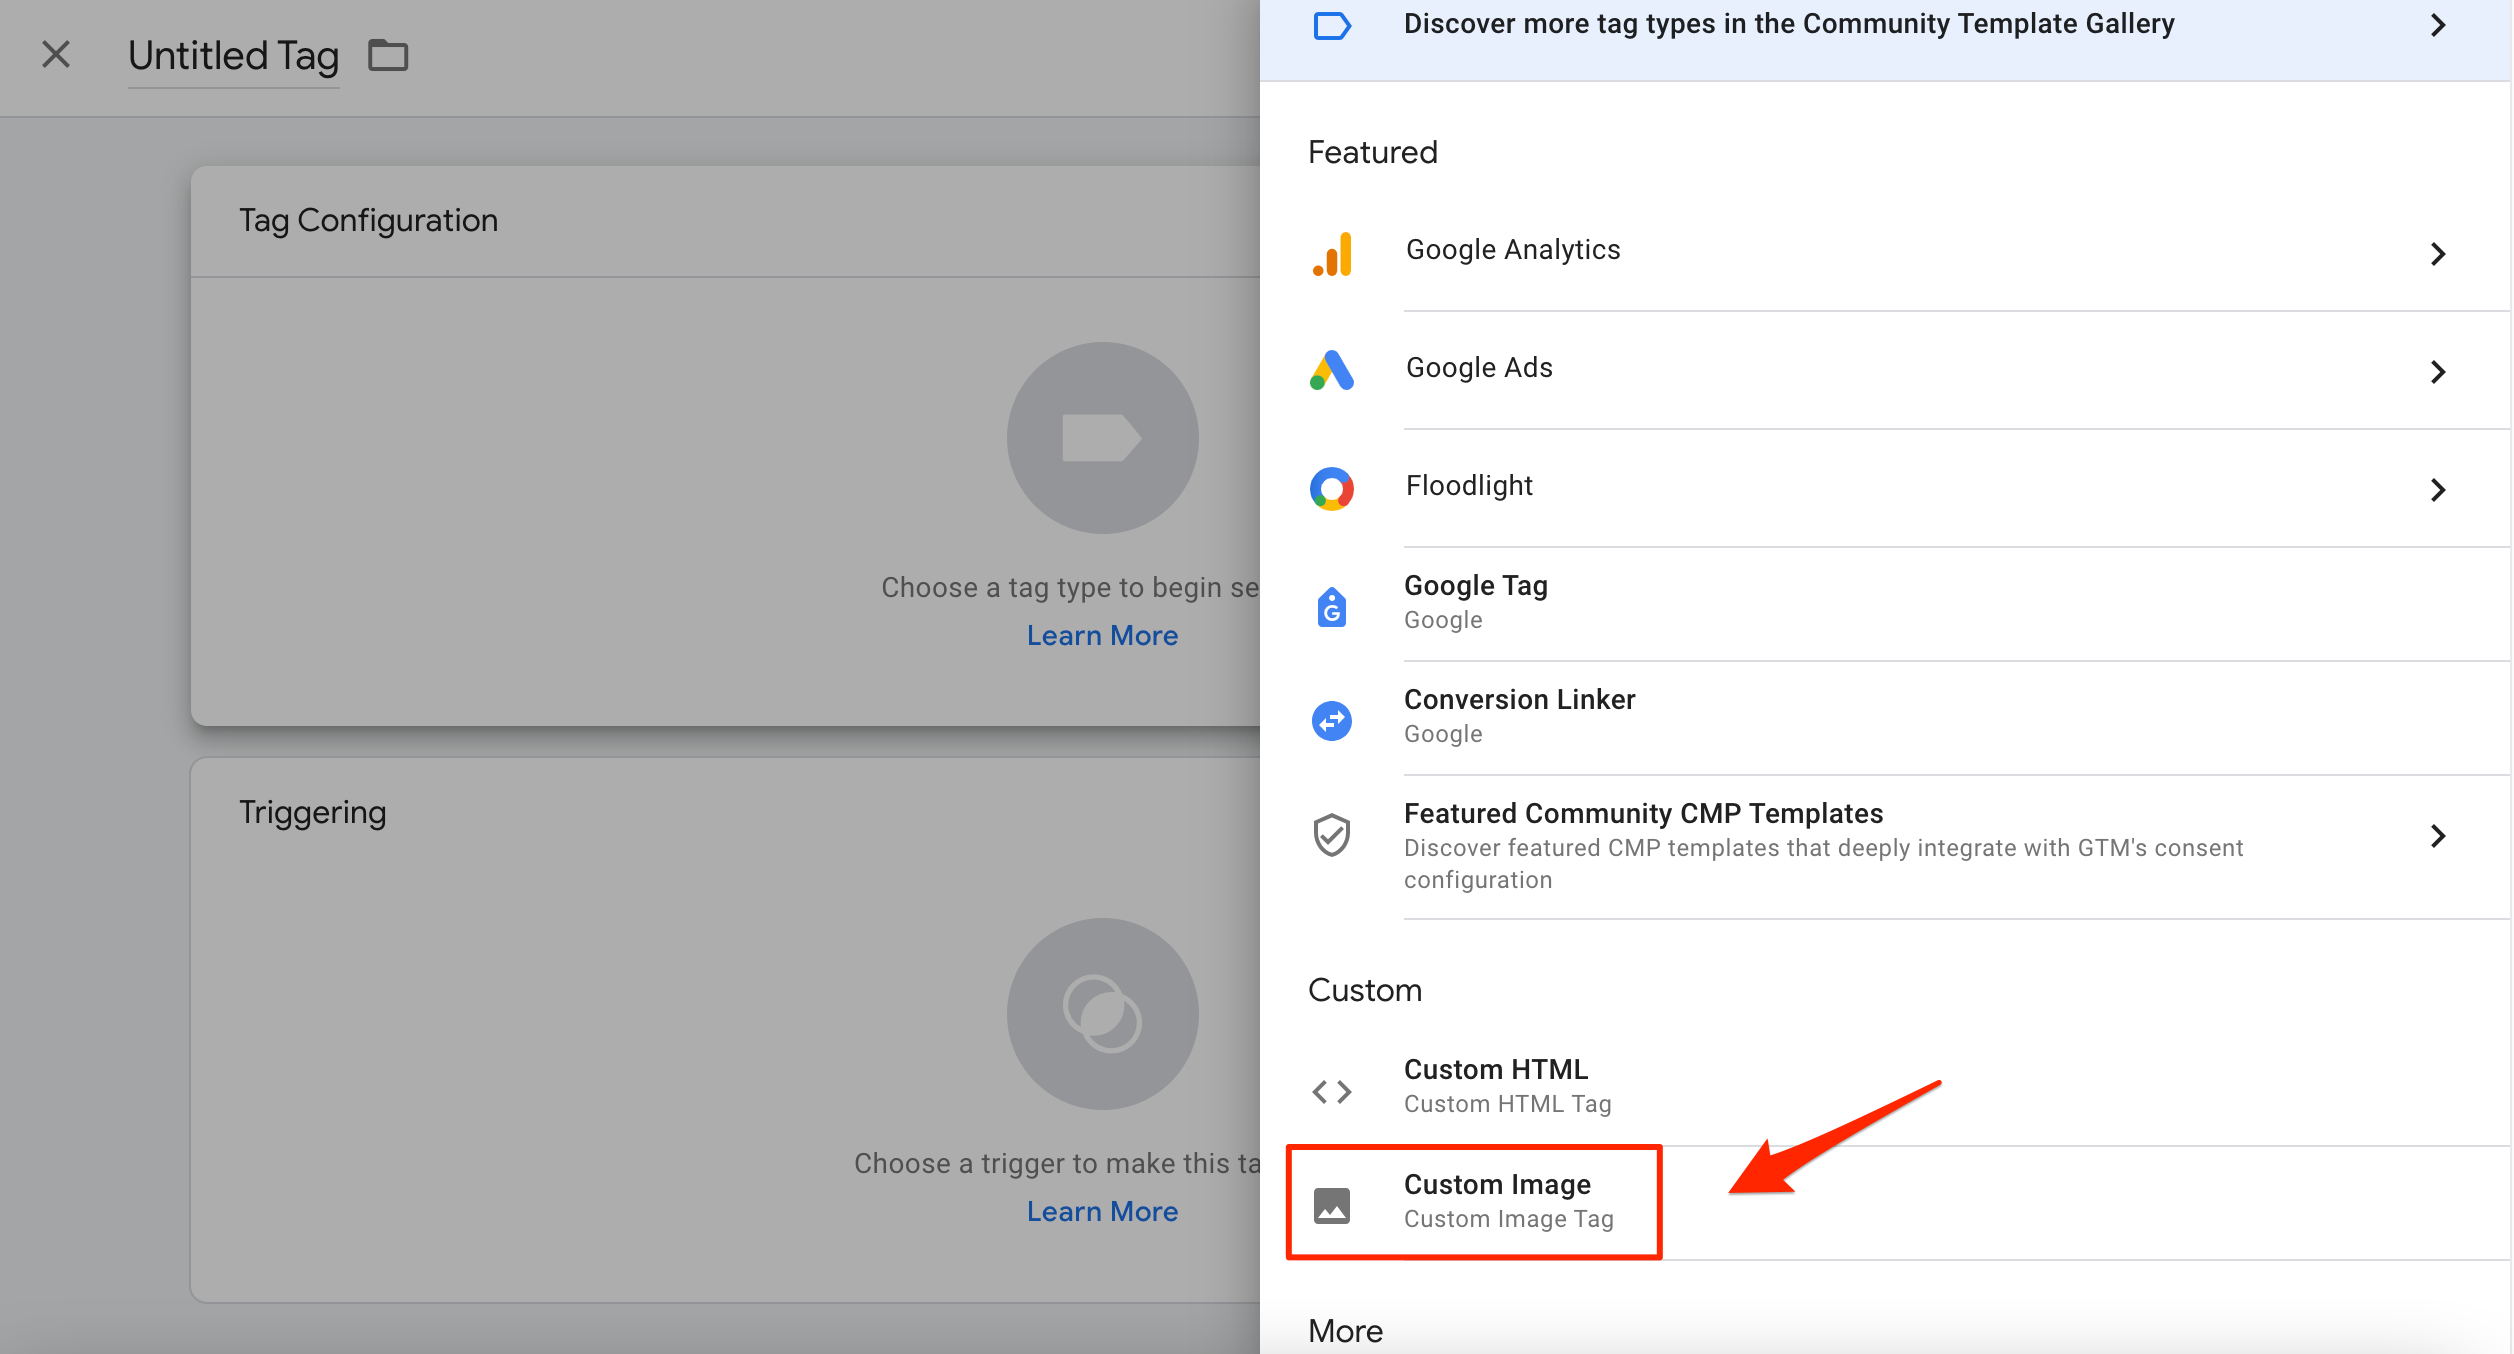
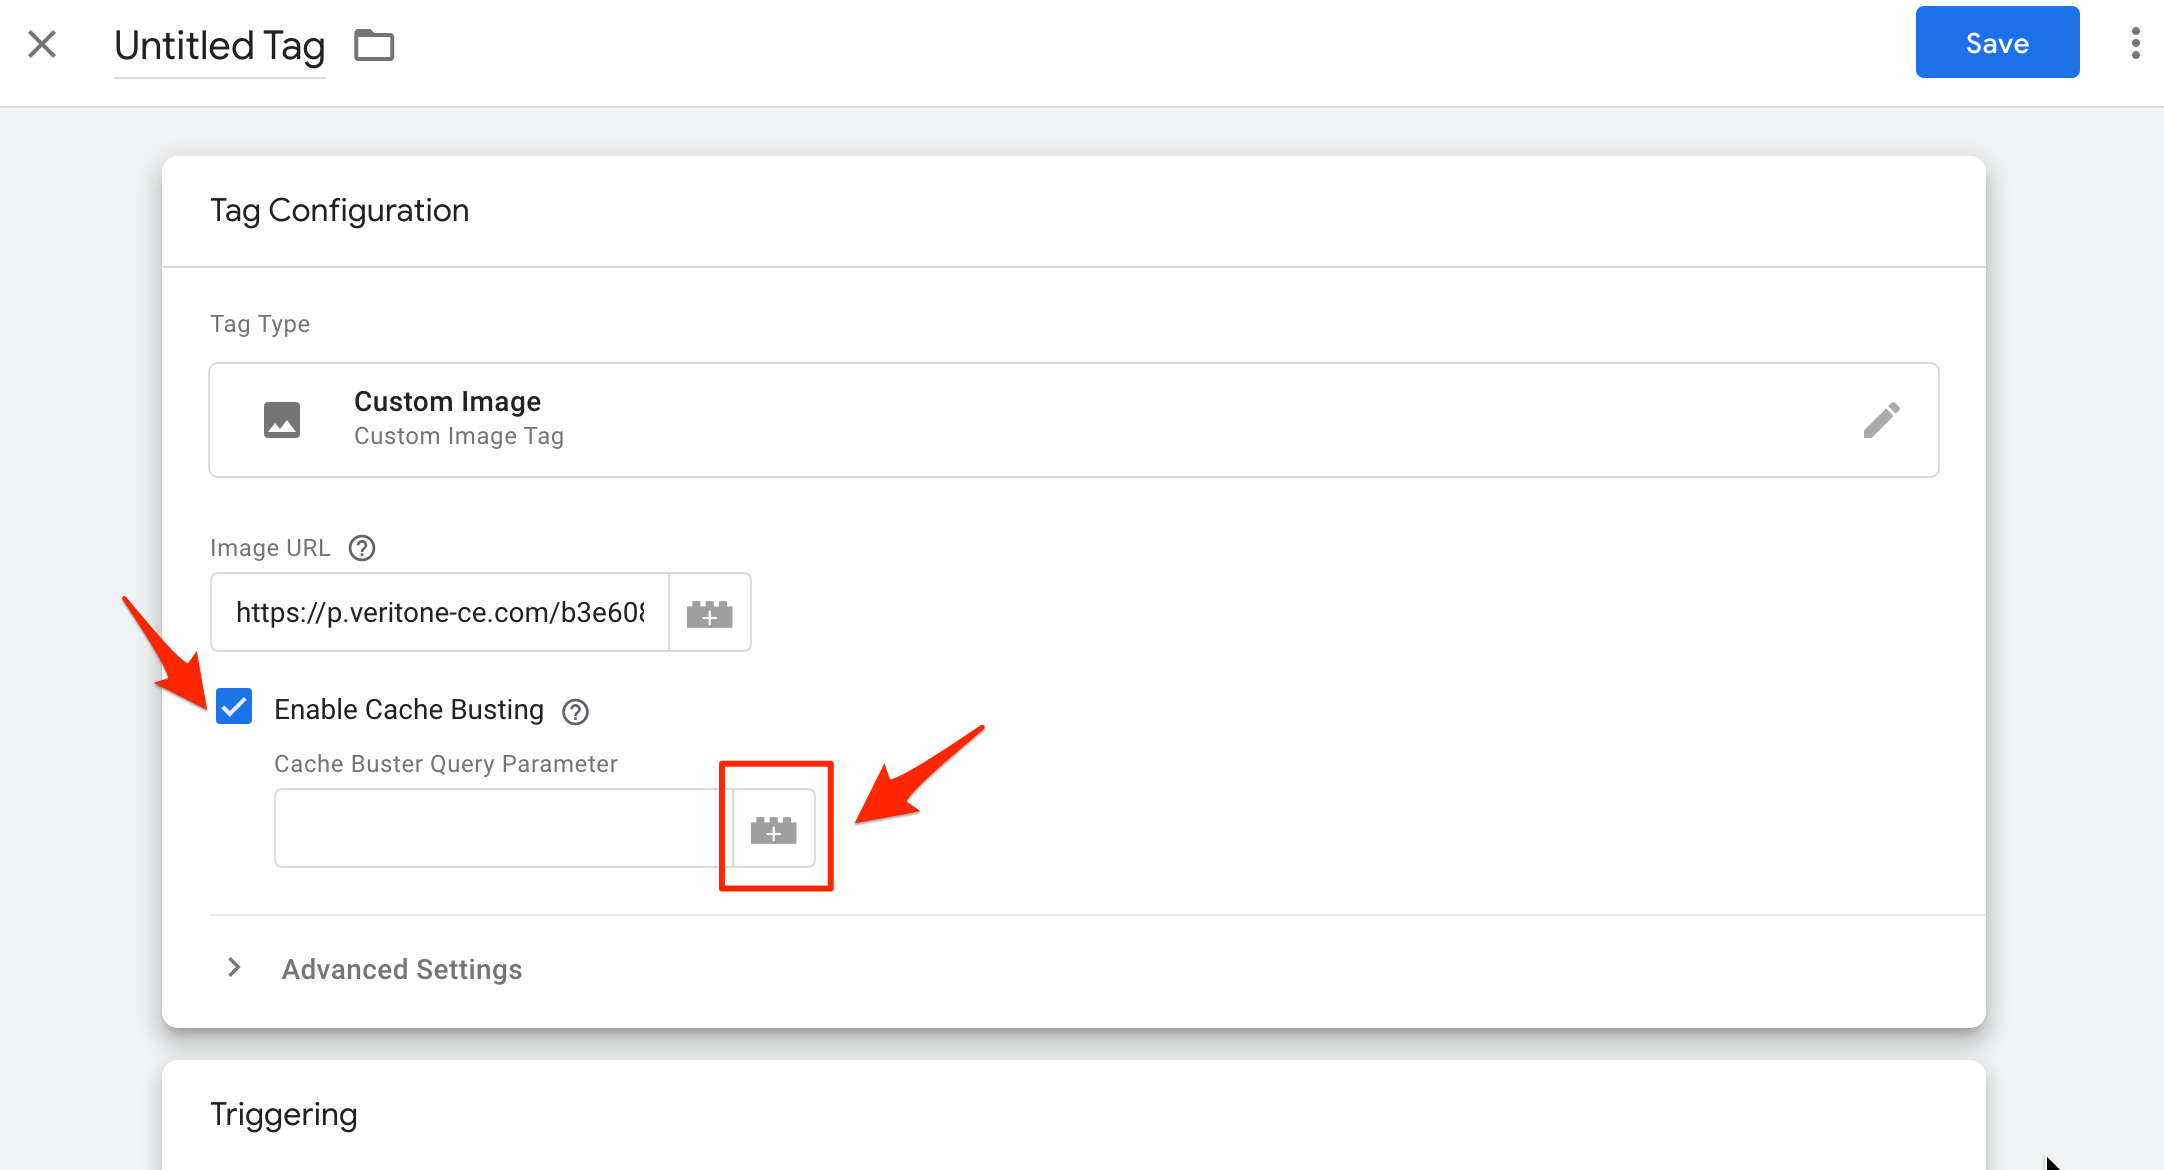
- Enter the Pixel URL provided by your broadcast partner in the Image URL field.
[Note]The URL should NOT have a trailing slash at the end (a trailing slash is / at the end of the URL; for example, www.veritone.com/).
- Tick the Enable Cache Busting checkbox and click the building block icon next to Enable Cache Busting.
The Choose a variable panel opens.
- On the Choose a variable menu, select Built-ins at the top right.
- Find the Random Number variable and click to enable.
- Copy and paste this string into the Enable Cache Buster field:
ts={{Random Number}}&url={{Page URL}}&ref={{Referrer}}
- Click Triggering. The Choose a Trigger panel opens. Select All Pages.
[Note]Selecting All Pages does not indicate that all your website pages will be tracked. You can deploy the pixel code on any pages that need to be tracked.
- Click Save. You can name your tag if desired.
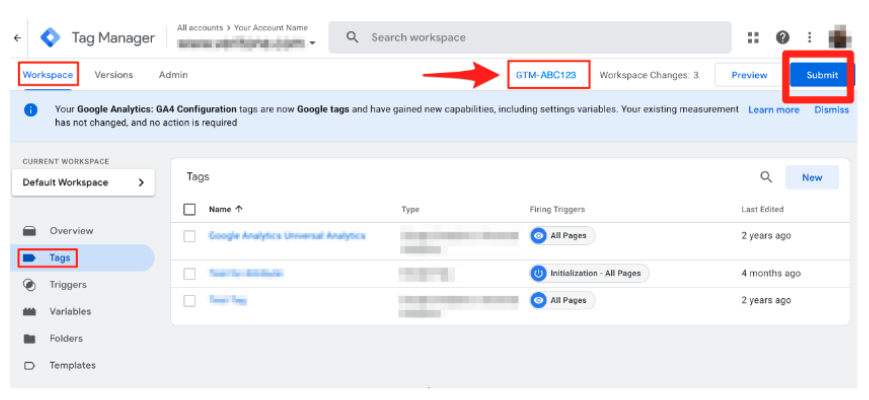
- Publish your GTM container. From the Workspace page, click the tag you created and click Submit and then Publish.
3. Install the Tag
Now that your tag is correctly configured and saved, deploy it onto your website.
-
Gather the code. In your GTM workspace, click the tag ID located below the search bar. The header and body code window opens.


-
Install in the header and body of your site. Pixel code installation varies depending on the website builder you use.
Wordpress websites
The following instructions are intended to be general and may not reflect your site setup. You can use a plugin with Wordpress or edit the code directly.
Plugins
You can use a Wordpress plugin to install the pixel.
Add the tag ID to the Settings area of the plugin. Depending on the plugin, you may need to go into each page on your site to activate the plugin for that page. Options for disabling global settings may be available so you can install the container code on only the pages you want to track.
Edit code
If you are using a child theme in Wordpress, you can add the Google Tag Manager tracking code into the header.php file. The following instructions are general and may differ depending on your theme setup.
-
- In WordPress, click Appearance > Theme Editor and then header.php.
- Paste the Google Tag Manager <head> code below the <head> code and then the Google Tag Manager <body> code below the <body> code.
- Click Update File.
[Note]If you change or update your WordPress theme, you must repeat this process again as the header.php might be overwritten.
Squarespace websites
The following instructions are intended to be general and may not reflect your site setup.
In your dashboard, go to Settings > Advanced > Code Injection. The Code Injection area opens where you can add custom code to the header and footer.
To set code for specific pages, go back to your home page and choose Pages. Open Page Settings > Advanced. Insert the heading code in. Click Save.
Shopify websites
The following instructions are intended to be general and may not reflect your site setup.
- In the Shopify admin section, go to Online Store > Themes > Customize > Edit code.
- Find the
liquidtheme and insert your header code under the <head> tag.
[Note]Changes to the liquid theme affect your entire site. Use caution when editing.
4. Validate
Once the tag code has been successfully installed, confirm implementation with your broadcast partner.

