Overview
Inverse Blur allows you to redact an entire scene while highlighting one or more persons or objects of interest. This feature is ideal for situations where you must isolate a specific person or vehicle—for example, redacting bodycam footage in a hospital to blur everything except a specific suspect.
Using Inverse Blur is a three-part process:
-
Select Detections: First, you will mark all the people or objects you want to keep visible.
-
Blur Background: Second, you will apply a blur to the background to hide everything else.
-
Preview: Finally, you'll preview the result.
Part 1: Select Detections to Keep Visible
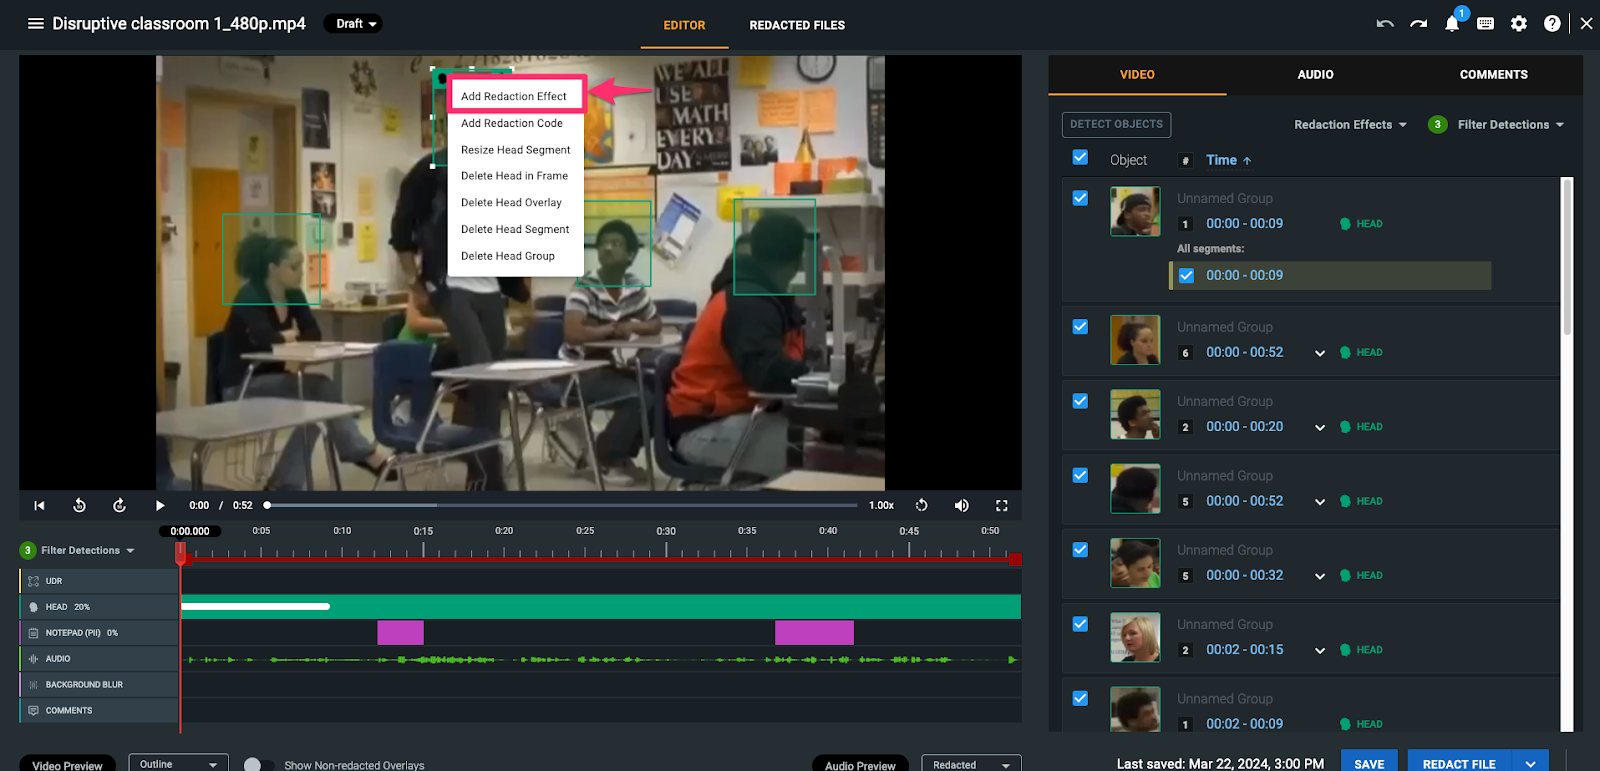
1. In the media player, click on the detection mask (e.g., head, person, object) that you want to remain visible.
2. From the pop- up menu, select Add Redaction Effect.
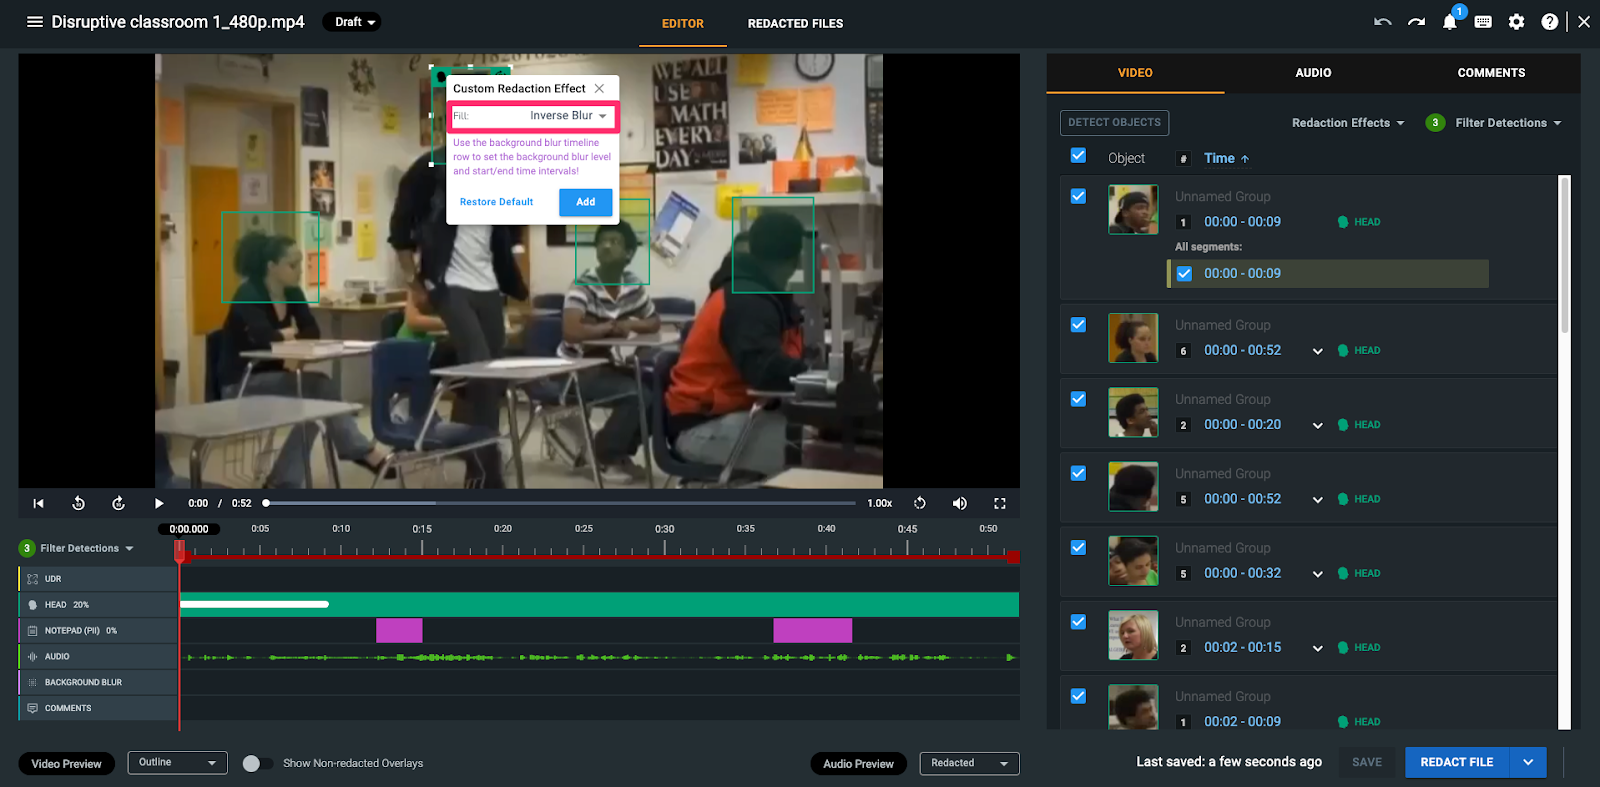
3. In the settings window, change the Fill option to Inverse Blur and click Add.
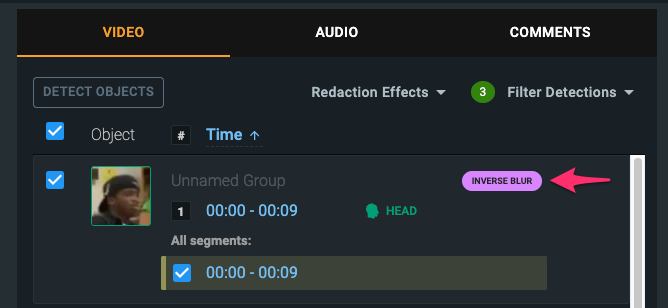
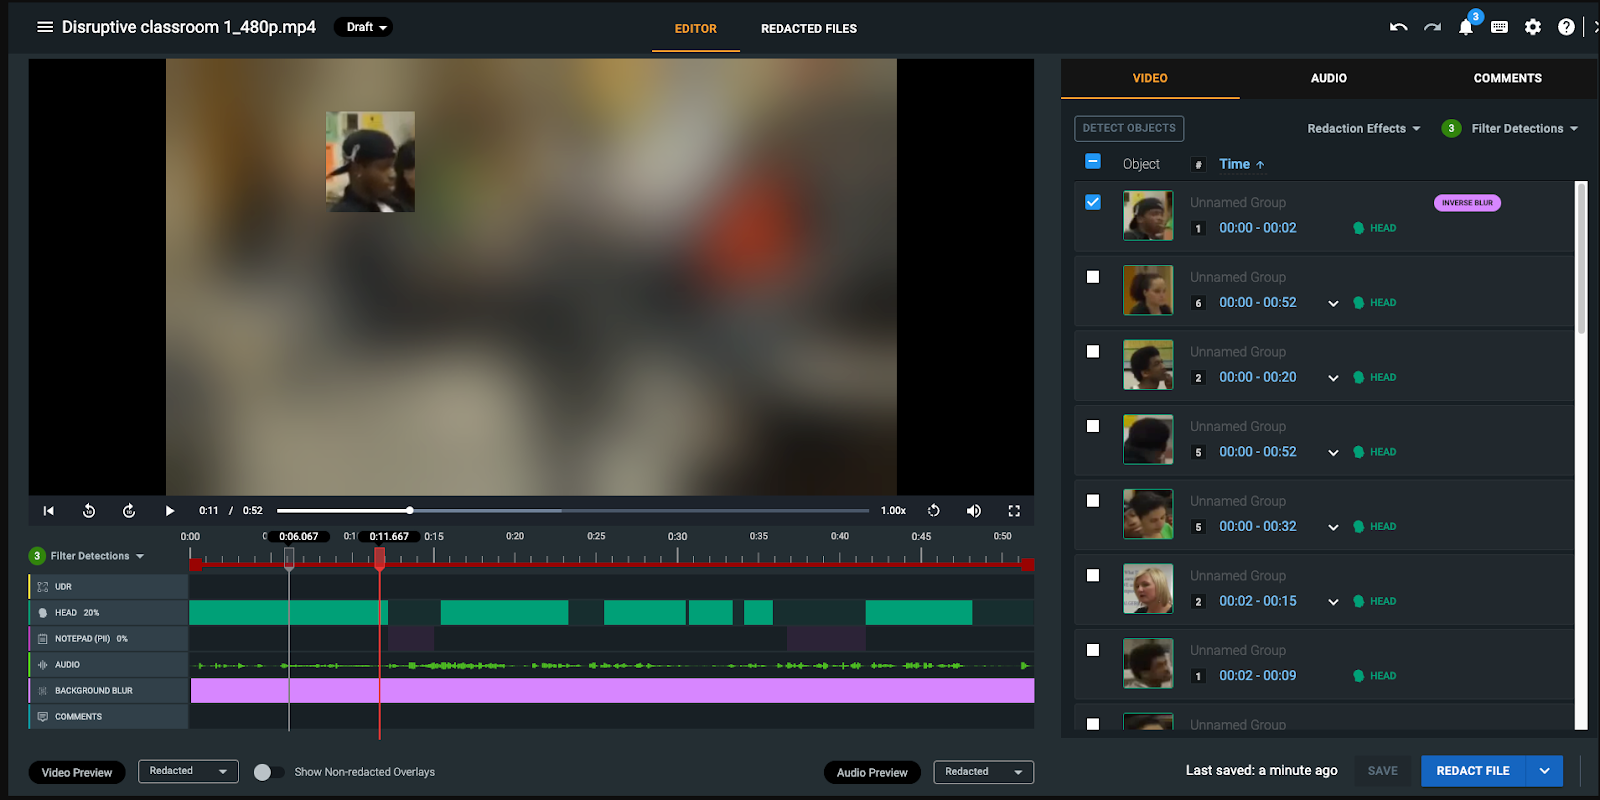
4. You will see the Inverse Blur effect applied to that detection in the Video tab.
5. Repeat steps 1-3 for all other detections you need to keep visible in the scene.
Part 2: Apply the Background Blur
Once you have tagged all the objects you want to keep, you must apply the blur to the rest of the scene.
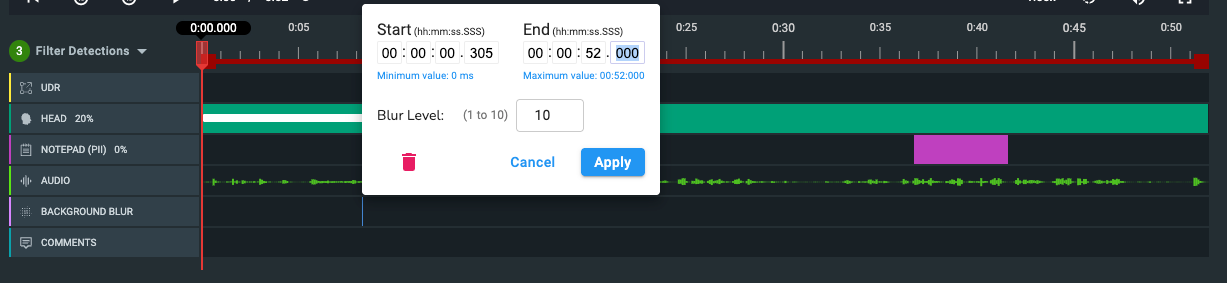
1. Navigate to the Background Blur timeline, which is located below the media player.
2. Click on the timeline and enter the Start and End times for when you want the background to be blurred.
-
-
Pro-Tip: To blur the background for the entire video, you can select the blue text that says “Minimum value: 0 ms” and “Maximum value: XX:XX:XX ms”, and the start and end time fields will automatically populate those values
3. (Optional) Adjust the Blur Level slider to control the intensity of the background blur (10 being the most blurry and 1 being the least).
4. Click Apply to save your changes.
Part 3: Preview Your Inverse Blur
1. To preview your final redacted video, navigate to the Video Preview dropdown menu (located above the media player).
2. Select Redacted. You will now see the background blurred, with only your selected objects remaining visible.
Note: The blur visible is not a 1 to 1 comparison with the blur level you selected for your background blur. This feature allows you to get a general view of your final output.
Tips and Best Practices
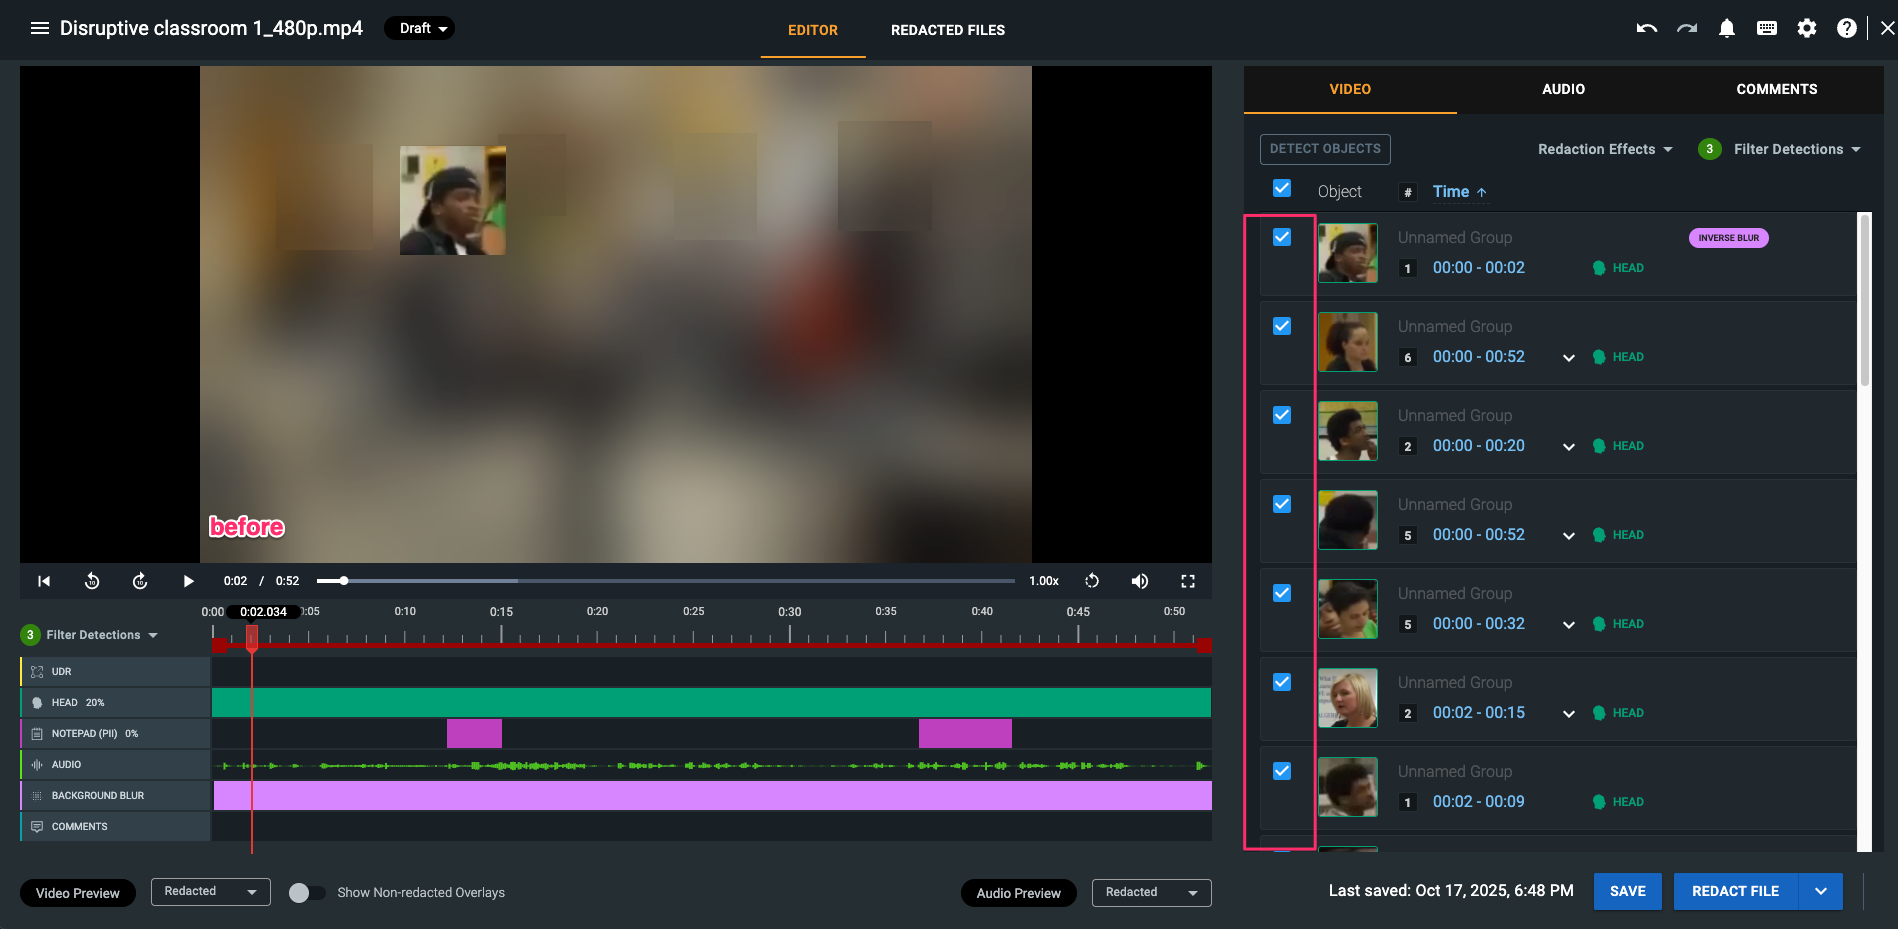
Best Practice: For a Cleaner Redaction, Deselect Unused Detections
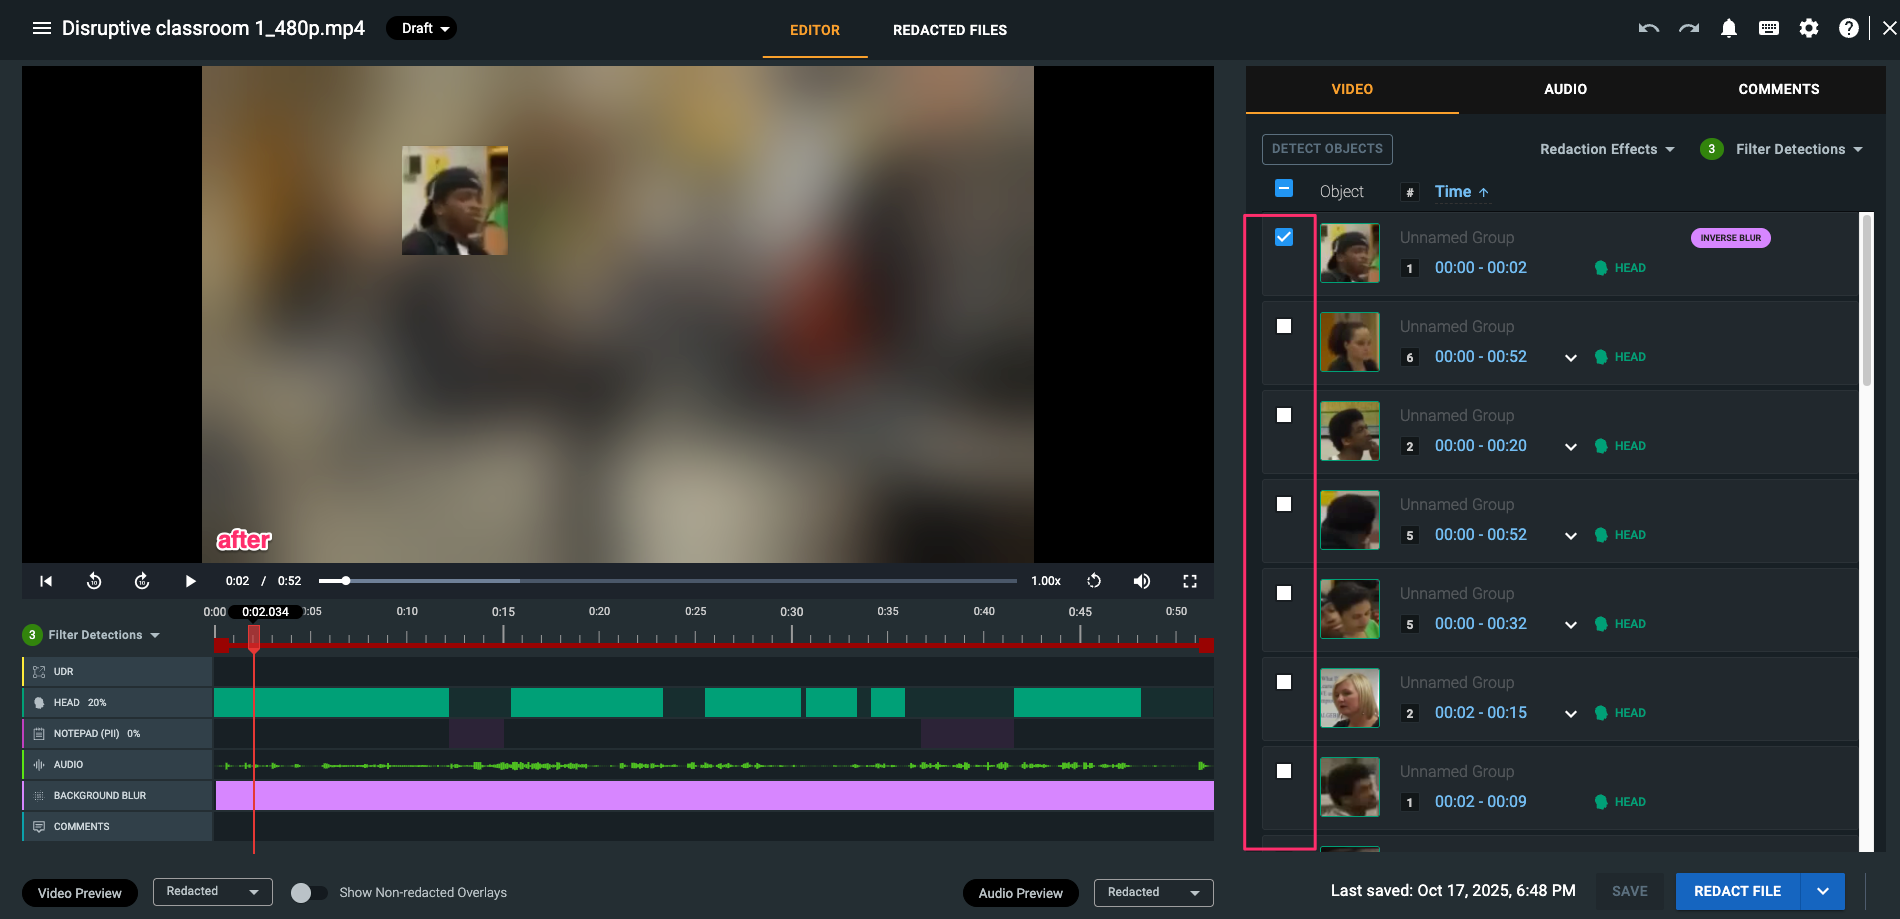
For the cleanest possible output, we strongly recommend hiding all detection boxes that you are not applying Inverse Blur to.
If you don't, their semi-transparent outlines may still be visible in the blurred background.
Quickly Apply to a Single Person
If you need to keep one person visible throughout the video, add all their individual detections to a single detection group first. Then, you only need to apply the Inverse Blur effect to that group one time, and it will apply to all detection segments within it.
Apply to an Entire Object Type
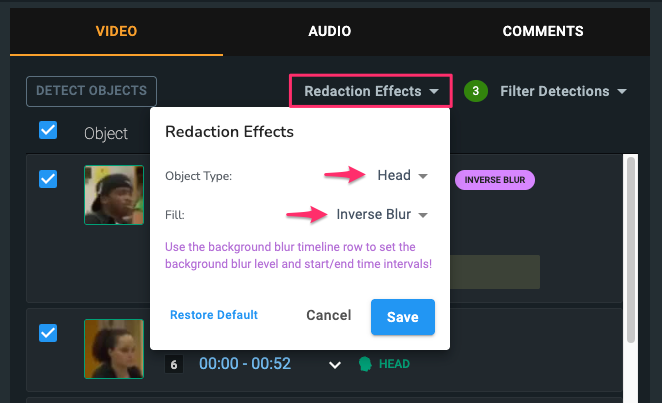
You can apply Inverse Blur to all detections of a specific type (e.g., all "Heads") at once.
-
In the Video tab, click the Redaction Effects menu.
-
Set the Object Type (e.g., "Heads") and set the Fill to Inverse Blur.
-
Click Save. The effect will be applied to all detections of that type.