You may have written your own engine or are using an existing using a third-party engine, and you need to deploy it into aiWARE and register it as a resource. You do this by creating the engine in the aiWARE ecosystem through the Resource Center.
If you're following the tutorial steps to build a simple text-processing engine, this is step 2. To see all the steps, see the user guide process page.
Create a new engine
- Access the Resource Center utility by logging into your aiWARE account. Click the utility icon
 . Select the Resource Center folder icon at the bottom
  . The Resource Center panel slides out.
 - In Resource Center, click the + Create New button > Resource > Engine.
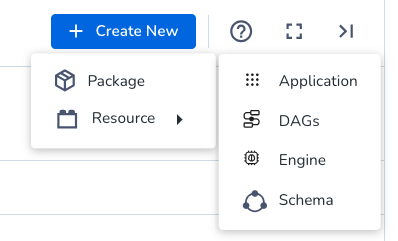
You will be guided through a wizard.
Step 1: General

In the general step, set:
The distribution options are:
| Distribution type | Description |
|---|
| Private | The engine will not be distributed outside either the organization or the aiWARE instance it was created in. |
| Org locked | The engine will only be distributed to instances within your organization. |
| Shareable | The package can be granted to other organizations, but unlike Public packages, it is not automatically shared, and must be granted to them. |
| Public | The package will be made available to all organizations in the same aiWARE instance without needing to be granted. |
| Instance locked | The engine will be sharable to other organizations on your instance only. |
Step 2: Functionality

In the functionality step, set:
- Engine class and category. Use the wizard to select an engine class and capability.
- To register a correlation engine, choose Data > Correlation.
-
To register an adapter, click the header under Engine Class (Audio is selected by default) to bring up a list of all engines and adapters.
(see Adapters for more information)
- Engine mode. Use segment or stream engine modes instead of batch, which is deprecated.
- Tags. Tags can be custom set for ease of use when gathering engines and other resources into a package.
- Engine deployment model. Set deployment models depending on your use case and the way your engine will process the input data.
| Deployment model | Use case |
|---|
| External access | Engines that require internet access for tasks such as license checks to an external server or downloading reference data, but don't send user data outside the container. |
| Network isolated | Engines that perform their processing entirely within thier container, running only within Veritone's infrastructure. There is no internet access and no external calls are made. This is the most secure deployment model and recommended for government, legal and compliance, and media and entertainment uses, which often run on prem. |
| External processing | The engine does some or all of its processing outside its container and therefore requires internet access. For example, user data may need to be sent to external services (such as cloud API) for processing. |
| Human review | The engine requires human intervention to complete its processing, and therefore requires network access. |
- Supported input types. Click the + Input Types button to check all media types your engine will support.
- Custom fields. See Custom fields for more information.
Step 3: Use cases

Add a summary of how and where the engine will be used. This is an optional step.
Step 4: Integration

In the integration step, set:
Step 5: Confirmation

In the confirmation step, you can upload your engine file. You can skip this step and upload a file later by editing an engine.
Upload an engine file
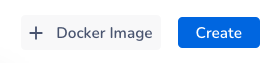
- Click the + Docker Image button.
Engines are deployed in Docker containers, which are like lightweight virtual machines. The platform automatically creates instances of your engine to meet demand. All engines in aiWARE are packaged as executable Docker containers, which are exposed via webhook through Veritone's Engine Developer Toolkit. An engine webhook can pass data as a JSON object, which makes engines widely compatible with all the programming languages. The most common languages used for implementing engines are Go, Node.js, and Python.
You can deploy an engine by adding the Docker image or a file of the Docker image to aiWARE. The steps below assume you have already written an engine or obtained a third-party engine.
Docker upload steps
To onboard a Docker image engine, you need the following:
- A Docker image engine in your computer or VM.
- Access to a Docker image repository. This documentation uses Docker Hub.
- In the terminal, log in to the Docker image repository. Type this command:
docker login
- To tag and push the Docker image, type the following:
docker tag engineName DockerHubUsername/engineName
docker push DockerHubUsername/engineName
where
engineName is the engine build in your local computer or VM.DockerHubUsername is a repository in the default registry in Docker Hub.
File upload steps
To onboard an engine with a file, you need the following:
- A Docker image engine in your computer or VM.
- Access to a storage repository that can be accessed by aiWARE. This documentation uses Amazon S3.
- In the terminal, in a temporary directory, type the following:
docker save engineName | gzip > engineName.tar.gz
- In your browser, go to your account in Amazon S3.
- Upload the engine file.
- When the upload is complete, click Close. The Bucket page appears.
- In the Objects tab, in the Files and Folders section, click the engine file checkbox, and then click Actions > Make public.
- Select the engine file. The properties page appears.
- In the Objects overview section, copy the Object URL.
- See Editing an Engine below to access the engine build and enter the link.
Deploy the engine
In the left side of Resource Center, click Resources > Engines. Find your engine or filter it  by a "ready" status.
- Click the Builds tab on the engine. The engine has an Available status, depending on your engine configuration and your permissions.
- Click the Submit button. The status changes to Approved.

- Click Deploy. The status changes to Deployed.
Edit an engine
Once an engine is created, you can edit some of its settings and upload your engine file.
- Click Resources > Engines
- Click your engine in the list. Click the options icon
 to edit, upload a build, or delete the engine.
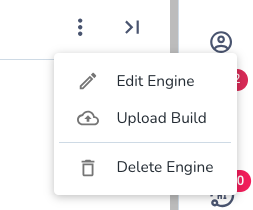
- Click the Builds tab of the engine detail to see the build history of the engine. You can pause builds of the engine here.
- If uploading a build, the Create New Build panel opens.
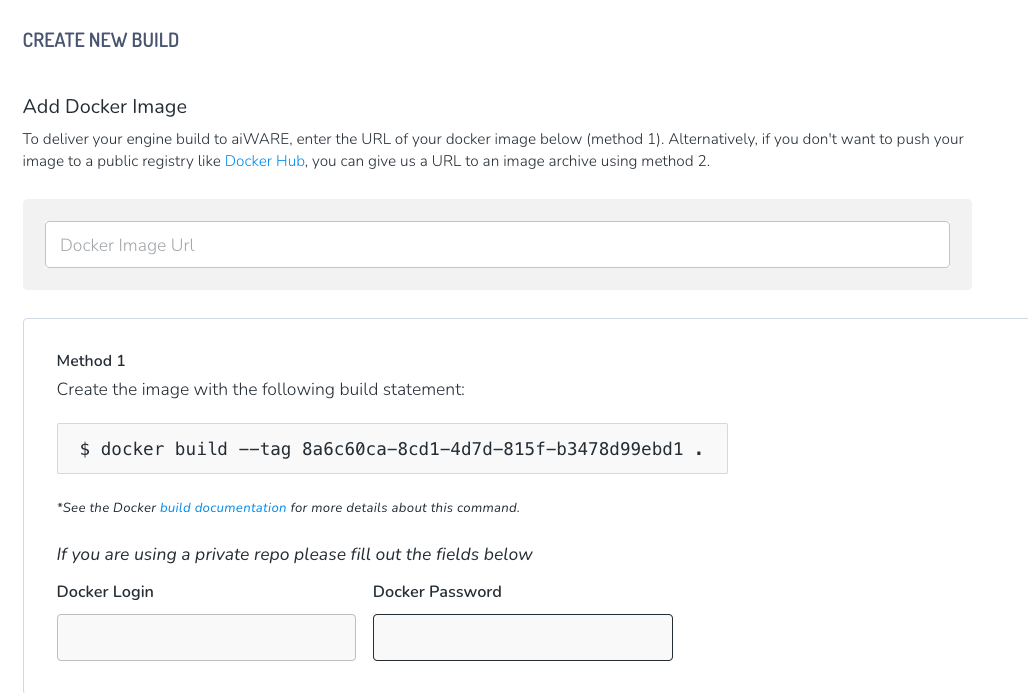
[Note]If you're following the steps to build a simple text-processing engine, continue to step 3:
Create the Docker build.

