As an instance admin, you can view and manage all organizations within your environment. This allows you to see all details related to each organization, including its users, provisioned products, and settings.
Access Instance Admin Center
To access the Instance Admin Center utility, log in to your aiWARE administrative account. You will need a superuser account. From the header bar, select  and then Instance Admin Center
  .
.
The Instance Admin Center slides out as a panel.
Create a new organization
Creating a new organization follows a three-step process: Basic info, Packages, and Organization settings.
Basic info tab
-
Organization logo: An optional logo that represents the organization. Displayed in several places throughout the operating system.
-
Organization name: The required name of the organization. Displayed in several places throughout the operating system.
-
Business unit: Used to categorize the organization's type of business. Only used for tracking and analytics and is not displayed to users of the organization.
.png)
Packages tab
Packages grant users in an organization access to various aiWARE resources. Setting the initial applications and engines available for use within the organization is important for setup.
.png)
Enable a package for use:
-
Package type: Use the dropdown to select the package type (application or engines).
-
Package search: Use the search bar to locate the package by name.
-
Package info: Click the Package Info icon in a package's row to view the Package Detail and explore the resources available in each package.
-
Package enable: Click the + icon on each package to enable it for use in the organization.
[Note]After the initial organization creation process, additional packages can be added by viewing the Resource Center from inside the organization.
Organization Settings tab
Choose settings for the organization; these are only configurable by an instance admin. Settings control key functionalities, such as determining which application will load first for the organization's users.
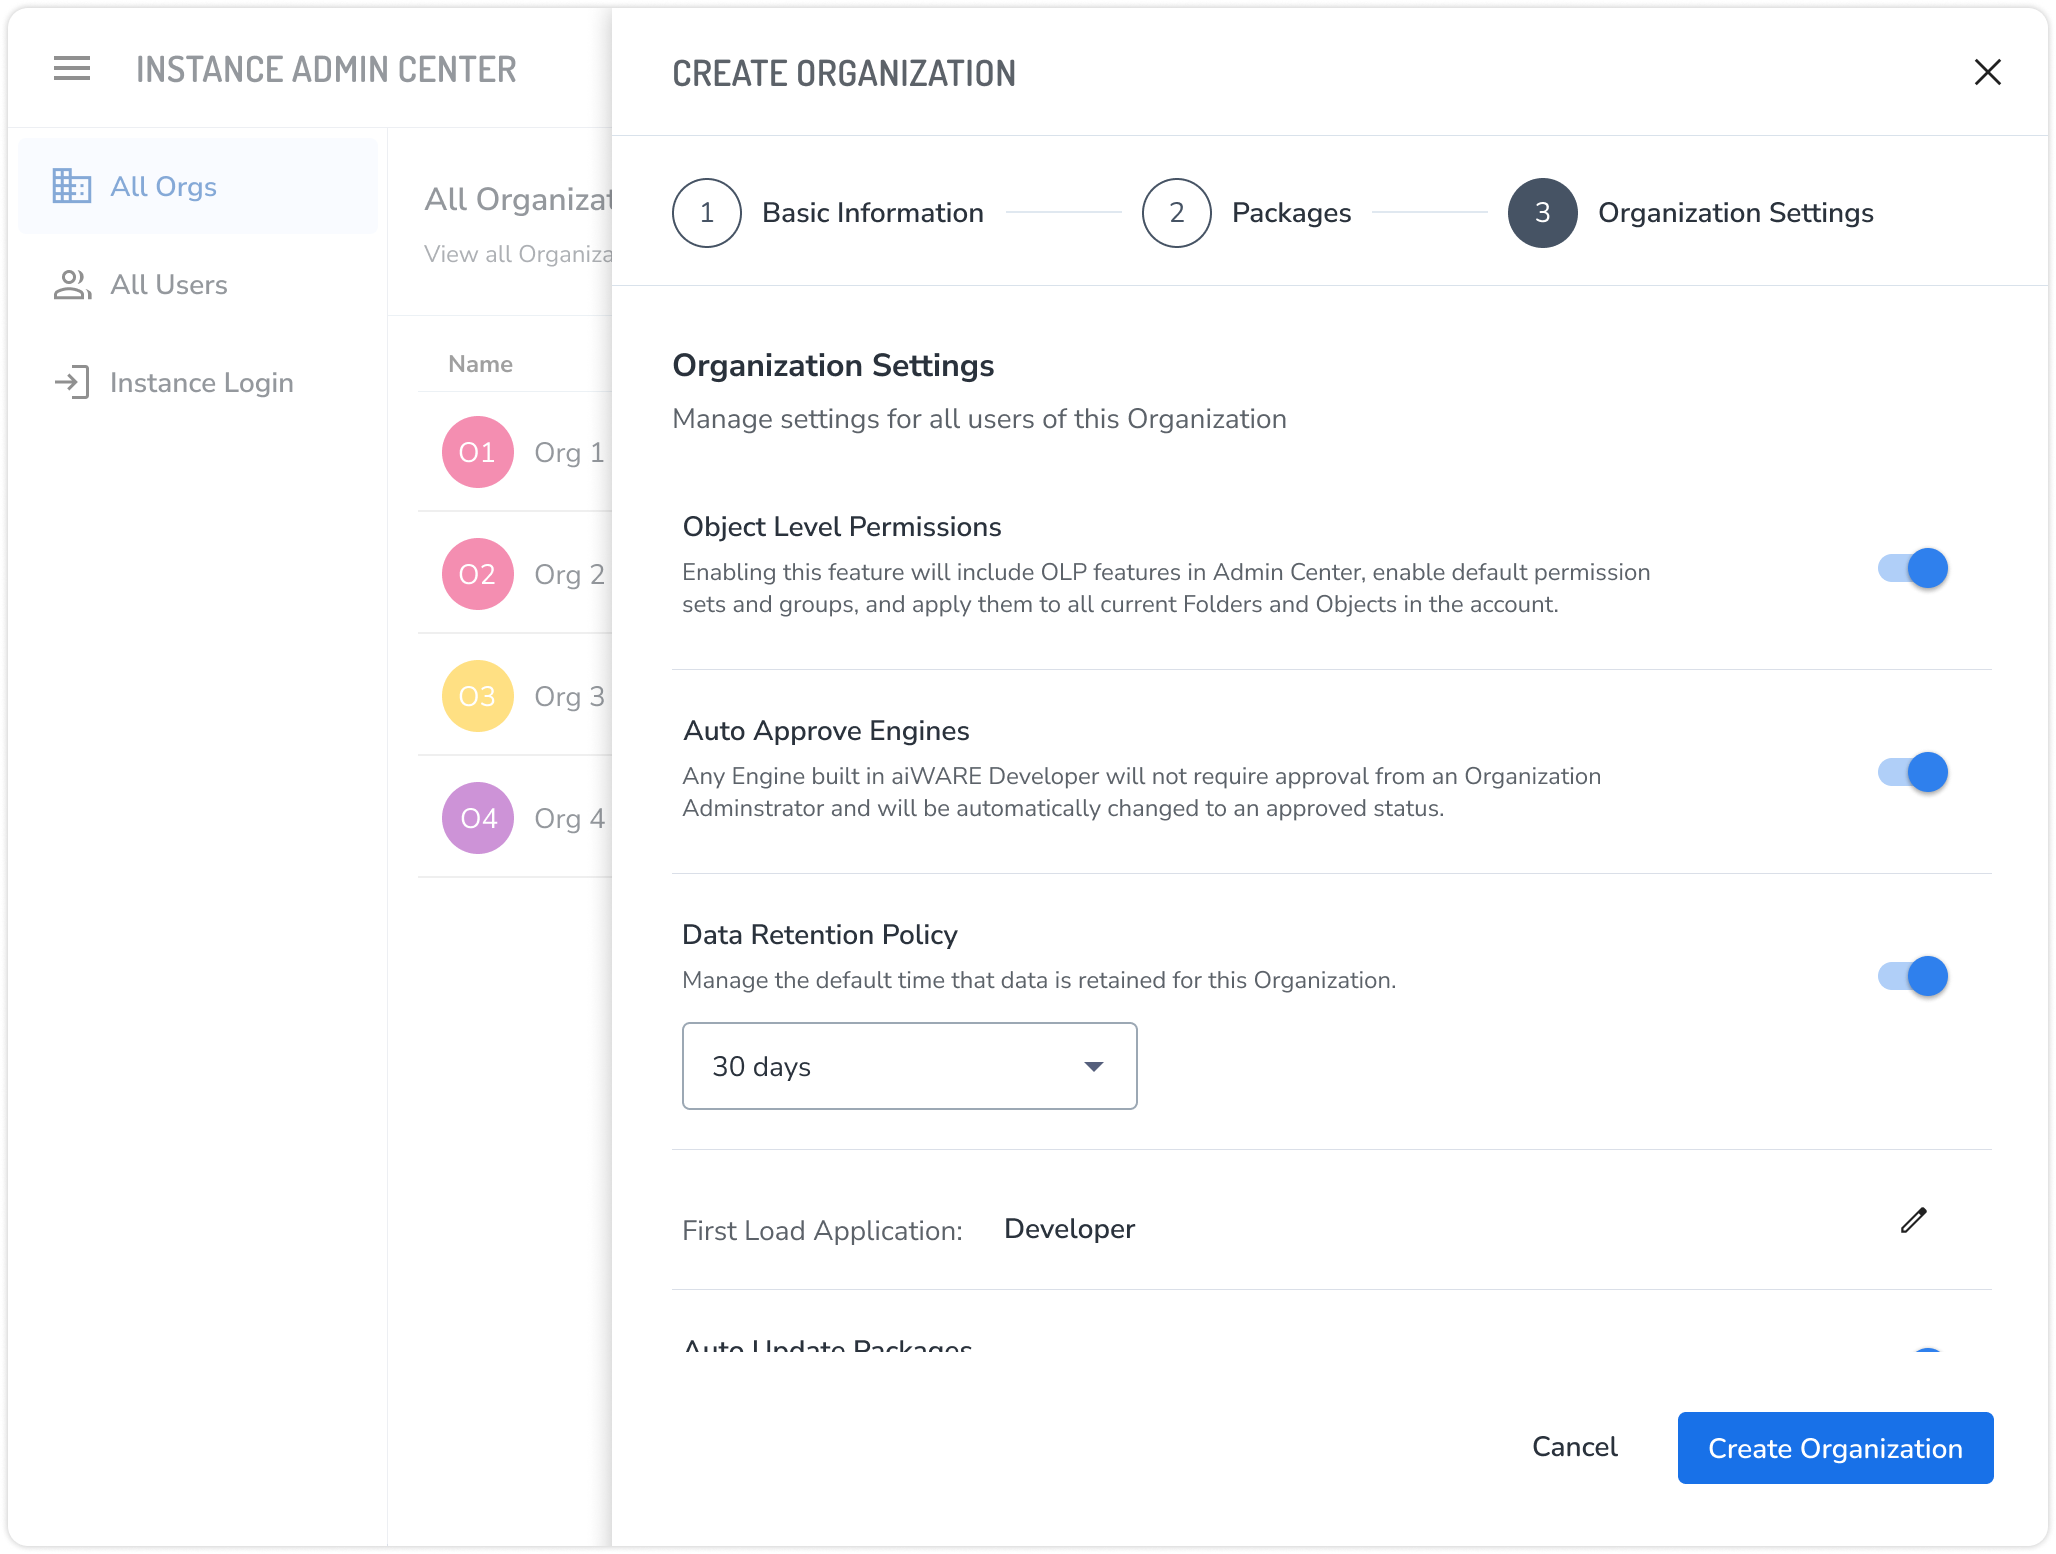
Settings include:
- Object Level Permissions: Enables the use of object level permissions inside the organization, which enable a set of permission features inside of Admin Center, as well as the ability to secure folders and TDOs for the organization using access controls.
[Note]The Object Level Permission feature can only be enabled during the organization creation process.
- Auto Approve Engines: When enabled, admins do not need to approve engines going from draft to approved status. Enable this setting when an organization will not have an administrator managing the account.
- Data Retention Policy: When enabled, choose from 30 days, 90 days, or 15 months to remove data from your organization after that period of time.
- First Load Application: Select the default first load application for users of your organization.
- Auto Update Packages: When enabled, administrators do not need to accept the latest version of a package, and any update will be automatically updated for the organization.
- Deactivate Organization: When enabled, the organization will be changed to a “Deactivated” status. This will remove or deactivate any accounts associated with this organization and stop any scheduled jobs that are currently running. This action can not be undone.
Click the Create Organization button to finish the creation process. A confirmation message appears that allows you to view the created organization and take further action such as adding users, setting application configurations, or configuring groups inside the organization.
[Note]As the creator of the organization, you will be added directly to the organization as the administrator. This organization can now be accessed via your organization switcher in your utility bar.

